Showing posts with label vegetables. Show all posts

Wednesday, March 4, 2009

Improvising Indian: Chickpeas and Greens Simmered in Yogurt

Hi readers, we've moved!
Read this post, and new ones, at the new Pithy and Cleaver! Thanks for updating your book marks. We hope you like the new design.


I would love to invite a group of friends to my apartment for an Indian feast. I'd to try the tandoori chicken from a recent Cook's Illustrated (recipe here on The Bitten Word), charred under the broiler with a coating of garam masala, ginger, and chili powder. Perhaps I'd even make an attempt at naan with onion or garlic and a mango salsa. For dessert, an assortment of tropical sorbets, or maybe a coconut tapioca?

But when I saw a recipe for
spinach simmered in yogurt with turmeric and coriander in last month's Food and Wine, I didn't want to wait for a big party. Perhaps it's end-of-winter braised-meat fatigue, or a vitamin deficiency as the cold weather drags on, but a bowl of greens is an appealing supper all on its own to me. Especially after trudging home through the slushy puddles overflowing every gutter in the city.

The very first mesclun leaves are appearing at the Union Square farmer's market, but I needed piles, since greens cook down to nothing. Don't underestimate—you probably need a bunch of greens per person if you're serving this as a main course. And if even if not, since it's delicious. I picked out spinach and nice-looking mustard greens at Whole Foods. To make it a bit more substantial, I added two cans of chickpeas for a tangy spin on chana saag. (I increased and varied the spices too after a taste—chickpeas take quite a bit of spice.)


I would not use frozen spinach for this, even if someone else gives you permission. Since the dish only simmers for a few minutes, fresh greens elevate it above takeout Indian. The mustard greens are pleasantly potent, and the spinach stays sweet and fresh. You could probably make this ahead, as well, cooking the spices and chickpeas and wilting the greens, then just combining it all with the yogurt to warm through when your guests arrive.


Chickpeas and Greens Simmered in Yogurt

Serves 2-3 as a main course
Inspired by Food and Wine, February 2009

2 bunches spinach, rinsed carefully
1 large bunch mustard greens
2 tablespoons vegetable oil
1 yellow onion, minced
5 garlic cloves, minced
1/2 teaspoon chile flakes
2 teaspoons ground coriander
2 teaspoons turmeric
1 teaspoon garam masala
1 teaspoon curry powder
1 teaspoon fresh ginger, chopped
2 cans chickpeas, rinsed and drained
1 tablespoon tomato paste
2 cups plain whole-milk yogurt
Salt

Carefully wash spinach and mustard greens and place in a large pot. The water clinging to the leaves will help steam the greens. Cook, covered, over moderate heat until barely wilted, stirring occasionally. Transfer to colander. Press excess water out of greens and set aside to cool. Coarsely chop.

Heat the oil over medium heat in a dutch oven, add the onion and saute until translucent. Add garlic and chile flakes and cook until fragrant. Add coriander, turmeric, garam masala, curry powder, and ginger, and toast one minute, stirring. Add the chickpeas and tomato paste, tossing to coat. Add 1/2 cup water to deglaze, and cook until evaporated. Add another 1/2 cup water, and cook 20 minutes, stirring frequently. When garbanzos are tender, lower the heat and add chopped greens and yogurt to the pot, stirring, five minutes, until the yogurt begins to separate. Season generously with salt and serve with rice.

Sunday, February 8, 2009

Adventures with Kaffir Lime: Green Curry Stir Fry

Hey readers! We've moved! Please come check out the new site over here!


I think one of the greatest gifts of a city as big as New York is that even long-time residents can discover new things here. Not just new restaurants opening every day but treasures that have been hiding, tucked down a little street or just one subway stop farther, for years and even decades. I love how new the city continues to be to me, even five years in.

One of my best friends recently returned from three amazing weeks on honeymoon in Thailand. They sunbathed and explored and took a cooking class that included a guided tour of the unfamiliar fruits and vegetables of an outdoor market as well as instruction on ten thai specialties. I am jealous, to say the least. Upon her return, she imparted this bit of wisdom to me: "Thai cooking," she said, "isn't especially hard, in terms of technique. You really just need the right ingredients."

That was enough for me to finally get in gear. I knew there was a Thai market in Manhattan's Chinatown. I think I even poked around it once several years ago, on a Chinatown trip during which my roommate bought two teeny-tiny (probably illegal) turtles. She was determined to race them in the bathtub of our first apartment. At the time, I wasn't ready for kaffir lime leaves.

But older and wiser, I looked at a map and wandered down below Canal to a quiet stretch—a steep block that I hardly remembered was there. My walking companion worried that we were lost. But there it was. Dreaming of the flavors of green curry, I returned to Bangkok Center Grocery determined to find the right ingredients, the real stuff. The shop is tiny but packed with goodies. The sweet young man who was minding the store pulled kaffir lime leaves from the refrigerated section for me, and I scored a knob of galangal and a bunch of thai basil—they even had two different kinds!


The scent of kaffir lime leaves is transporting. Fragrant doesn't even begin to describe it. Track some down where you live, and soon. Toss the paired leaves (they remind me of stick-on mustaches) in a pan with veggies of your choice and they'll infuse your dish with musky lime flavor with a hint of bay. The leaves enliven jarred curry paste and elevate an everyday stir fry to something special.

It's no honeymoon in Thailand, but it did make me appreciate my city.


Green Curry Stir Fry
Adapted from Ken Hom
Note: this is really just a method, good for whatever stir-fry ingredients you are craving. Feel free to adapt further with other vegetables or add meat.

1.5 tablespoons vegetable oil
2-3 tablespoons Thai Green curry paste (I used Thai Kitchen brand, but you can also make your own.)
1 large onion, sliced
1 block tofu, pressed to rid of excess liquid and cut into squares
1 tablespoon prepared lemongrass (from a jar)
3 tablespoons chopped garlic
1 tablespoon finely chopped galangal or ginger (I actually prefer ginger and find galangal a little mustardy)
4 kaffir lime leaves
1 tablespoon fish sauce
2 teaspoons sugar
1/2 teaspoon salt
1 large globe eggplant or 2-3 japanese eggplants, sliced in one inch slices
2 carrots, sliced in 2" long, thin planks
1 small can bamboo shoots
14 fl oz can coconut milk (I used light)
3 tablespoons water
1 small can water chestnuts, sliced
2 red peppers, sliced
large handful fresh thai basil leaves
lime wedges for serving

When the vegetables are sliced, heat a wok or large frying pan (sometimes I do both so as to not crowd the vegetables and steam them) and add the oil. Make sure it's quite hot. Add the green curry paste and stir-fry for two minutes, then add the tofu and stir fry for another minute. Add the onions, lemongrass, garlic, galangal or ginger, kaffir lime leaves, fish sauce, sugar and salt, and stir fry for another 2 minutes. Add the eggplant, carrots, and bamboo shoots and stir fry one minute, then add coconut milk, water, water chestnuts and red peppers. Turn the heat down and simmer for 20 minutes or until eggplant is cooked and silky. Stir in basil leaves and serve at once.


Monday, January 19, 2009

A Ploy for Mae Ploy: Sweet Chili Sauce Lettuce Wraps


A couple of years ago, I was out west on vacation when I got an excited call from Virginia. Matt was at his friend Ramon's, and just had to tell me. Ramon made these awesome vegetables! They were really awesome! He used some really awesome sauce!

Luckily in his enthusiastic state he found out the same of said awesome sauce, and our love affair with Mae Ploy sweet chili sauce began. Thanks to Ramon, chili sauce veggies are a standard weeknight dinner around our place. Sometimes I add rice noodles and bits of mango, sometimes it's just a big mess of eggplant in a wok. It sort of doesn't matter, you could drink this stuff out of the jar. It's quite sweet and not that spicy, great with pork or chicken and a squeeze of lime. The discussion usually goes roughly like this:
Me: "Chili sauce for dinner?"
Matt: "Awesome!"
The rest of the ingredients don't really interest him.


This particular iteration was a winner, though. I was craving a big pile of colorful veggies wrapped in lettuce. I also wanted to try out a technique for chicken recommended by Jaden of Steamy Kitchen. Marinating chunks of chicken in cornstarch and egg white improves the texture and makes a light coating on the chicken bites while thickening the stir fry sauce. I used good organic chicken thighs, some ripe red peppers and crispy green beans, and plenty of chopped scallions, but you could adapt the recipe for whatever looks good at the market. Just make sure to get real Mae Ploy, the other brands aren't nearly as good.

One warning: this is not really dinner party food unless you're going super casual. It's a bit sloppy, and the veggies have a way of slithering out of their lettuce pockets.


Sweet Chili Sauce Lettuce Wraps

serves 2 generously

1 lb boneless skinless chicken thighs
2 teaspoons cornstarch
1 egg white
canola or other flavorless oil
1 lb green beans, ends removed
1 zucchini
1 cup mushrooms
2 red bell peppers
3 scallions
1 tangerine
1 teaspoon fish sauce
1 teaspoon soy sauce
1 teaspoon prepared lemongrass—you can buy it in a jar!
1/4 cup Mae Ploy brand sweet chili sauce
1/2 teaspoon Sriracha
Romaine or butter lettuce leaves (6 whole leaves)
1/2 lime, squeezed plus lime wedges for serving

Wash lettuce leaves and leave intact, drying on paper towels. Cut chicken into 1 inch cubes, place in bowl. Add egg white and cornstarch, stir. Let marinate 20 or 30 minutes in the fridge while you prepare vegetables. Slice green beans, mushrooms, zucchini, peppers, and scallions for stir fry. Do not mix. Remove peel from tangerine and slice into bite size pieces, removing seeds.

In a wok or frying pan, saute green beans in a bit of oil over medium heat, stirring occasionally until beans begin to wrinkle. Remove beans from pan. Add mushrooms and zucchini to pan, adding oil if pan is dry. Add fish sauce and soy sauce, saute, stirring occasionally, until vegetables have lost their liquid.

Meanwhile, heat another wok and add oil. When wok sizzles, add chicken. Let cook 2 minutes without disturbing. Add lemongrass. Turn and stir, cook a few minutes more. Add red peppers to vegetable pan (where the mushrooms are), cook over low heat while you continue to cook chicken in hot wok. Add half of the chili sauce to the chicken. When chicken is fully cooked (check a piece), add scallions, tangerine, and all vegetables to the wok. Add remaining chili sauce and Sriracha. Stir and make sure everything is warm. Serve on lettuce leaves with limes, extra Sriracha, and lots of napkins.

Thursday, January 8, 2009

Winter Vitamins: Pomegranate Spiced Carrots


It's January, and I think we're all feeling it. A bit too much sugar (I'm looking at you, peppermint brownies), a little too much bubbly (though this was a great discovery), and the first long rainy trudge back to work. And it's really just the beginning of winter. In these situations, colorful vegetables help.

Something is always broken in our tiny East Village home. Water drips from all corners of the ceiling when it rains, the chimney smokes until you can't breathe, and the sliding "doors" to the bedroom don't QUITE close. This week, as soon as it went down below freezing outside, the thermostat went on the blink. It was cccccold, so I really wanted to crank the oven on and leave it on a long time. (I suppose I could have really warmed myself up by doing an exercise video, but really, I wasn't feeling that virtuous.)

This recipe scored on both the vegetable and hot oven counts, plus it promised to use up the last few cups of pomegranate juice lurking in my fridge from a long-ago brunch. The recipe called for pomegranate molasses, which I fully intend to try someday when I can snag a cheap bottle, but cooking down juice on your own works fine. Heeding the warnings on Epicurious, I cooked the carrots halfway before adding the sweet glaze. It caramelized up nicely and didn't set off the fire alarm. (Well, I had already unplugged the fire alarm. That thing goes off if you cough in our apartment, and it's really loud.)


These are really zingy, with really bright flavors. They're not your regular sleepy roasted root veg. The cardamom and cumin are a strong foil for the fresh sweetness of pomegranate, mint, and basil. It's a little loud, as winter vegetable dishes go, but packs a welcome vitamin punch. Which might be what we all need.


Pomegranate Spiced Carrots
adapted from Bon Appetit

Serves two generously as a side dish

2 cups pomegranate juice
1 cup orange juice
olive oil for roasting
2 tablespoons finely grated peeled fresh ginger
1/2 teaspoon ground cumin
1/4 teaspoon ground cardamom
pinch ground nutmeg
pinch cayenne pepper
2 pounds medium carrots, peeled, halved lengthwise
1/3 cup pomegranate seeds (optional, I didn't have them.
1/3 cup pine nuts, toasted
2 tablespoons thinly sliced fresh basil leaves
2 tablespoons thinly sliced fresh mint leaves

Preheat oven to 400°F. Put carrots in roasting pan, sprinkle with olive oil, toss to coat. Roast carrots 30 minutes, stirring once. Meanwhile, pour pomegranate and orange juice in a small saucepan. Boil to reduce by half. Mixture will be not quite thick. Add ginger, cumin, cardamom, nutmeg, and pepper to pomegranate mixture. After carrots have cooked 30 minutes, reduce heat to 350°. Toss carrots with glaze and roast until carrots are tender and liquids are reduced to glaze, stirring twice and mixing in water by tablespoonfuls if needed to prevent burning, about 30 more minutes. Season with salt and pepper. (Can be made 4 hours ahead. Let stand at room temperature. Rewarm in 375°F oven 10 minutes before serving.)

Transfer carrots to platter. Sprinkle pomegranate seeds (if using), pine nuts, basil, and mint over carrots and serve.

Tuesday, November 18, 2008

Mo' Brussels Sprouts


On my birthday, we went out to eat brussels sprouts. I'd been looking forward to them for weeks.

I'm serious—David Chang (the chef behind the Momofuku empire) has the whole city, the food media, and tourists from everywhere talking about brussels sprouts. Fans wait with bated breath for the sprouts to appear on the seasonal menu again. They're like no brussels sprouts you've experienced before. The sprouts at Momofuku Ssam bar are a perfect combination of crispy and spicy, sweet and pungent. Familiar flavors—mint, cilantro, fish sauce—taste new when balanced against earthy brussels sprouts. In short, they're a treat.

Ssam bar isn't tooooo expensive, though it falls under "once in awhile" sort of expenditures for us. (And we didn't order the eight dollar bread and butter. Which is probably awesome. But please.) But because it's popular and small, sharing the Momofuku Sprout Experience with groups of friends necessitates making them at home. Luckily, a recipe was posted in Gourmet magazine last year. It would be an interesting addition to the Thanksgiving table, as long as your guests are a little open minded.


Notes: In the restaurant, the menu states that the sprouts are fried. They may be roasted and fried, but in any case, the texture is perfect, and somewhat difficult to reproduce at home. It's important to get all the crispy bits and not let the sprouts go soggy. A single layer in the dish is probably essential so the vegetables don't steam. If they're a little soft, I might try throwing them under the broiler once the dressing's on to crisp up the edges a bit. I used Bhel mix (an Indian crisped rice snack) and it looked like that's what Chang uses as well. Rice Krispies probably work fine if that's all you've got. I also added a squeeze of lime to the dressing, and added some cauliflower to the sprouts for a little variety.


Momofuku Ssam Bar Roasted Brussels Sprouts
Adapted from David Chang, Gourmet magazine

Makes 8 (first course or side dish) serving

For brussels sprouts
2 pounds Brussels sprouts, halved lengthwise. (You can also add chopped cauliflower)
3 tablespoons canola oil
1 tablespoon unsalted butter
For dressing
1/4 cup Asian fish sauce (preferably Tiparos brand)
1/4 cup water
1/4 cup sugar (I added about 1 teaspoon more)
3 tablespoons finely chopped mint (note: this is a lot, buy plenty!)
2 tablespoons finely chopped cilantro stems
1 garlic clove, minced
1 (1 1/2-inch) fresh red Thai chile, thinly sliced crosswise, including seeds (or squeeze sriracha)
Squeeze of lime
For puffed rice
1/2 cup Bhel mix (or crisp rice cereal such as Rice Krispies)
1/4 teaspoon canola oil
1/4 teaspoon shichimi togarashi (Japanese seven-spice blend)

Garnish: cilantro sprigs; torn mint leaves; chopped scallions

Roast brussels sprouts:
Preheat oven to 450°F with rack in upper third. Toss Brussels sprouts with oil, then arrange, cut sides down, in a 17- by 12-inch shallow baking pan. Make sure sprouts are in one layer. Roast, without turning, (ok, I stirred them once) until outer leaves are tender and very dark brown, 40 to 45 minutes. Watch carefully toward the end, you want sprouts quite crispy, with burnt bits, but not completely incinerated. Add butter and toss to coat.

Make dressing:
Stir together all dressing ingredients until sugar has dissolved.

Make puffed rice while sprouts roast:
Cook cereal, oil, and shichimi togarashi in a small skillet over medium heat, shaking skillet and stirring, until rice is coated and begins to turn golden, about 3 minutes. Remove from burner and cool, stirring occasionally.

Finish dish:
Put Brussels sprouts in a serving bowl, then toss with just enough dressing to coat. Sprinkle with puffed rice and garnish, serve remaining dressing on the side.

Monday, November 17, 2008

Ode to a root vegetable: Spicy maple-glazed roast carrots.

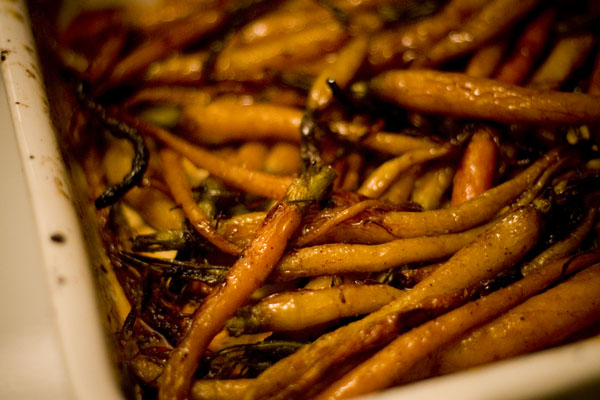
cooked

It is no small irony that I suddenly find it difficult to find intriguing ways to incorporate vegetables into the evening meal. I, the woman who learned to cook when she was not just a vegetarian, but a VEGAN, is experiencing a vegetable block. I find respite from time to time at the Union Square farmer's market, where the variety of fresh, colorful, unexpected vegetable matter is at times nothing short of overwhelming, and has been known to rekindle long-dormant love affairs with vegetables that have for one reason or another fallen out of my favor. For example: I hold the farmer's market personally responsible for my discovery of what might be my new favorite vegetable side dish, spicy maple-glazed roast carrots.

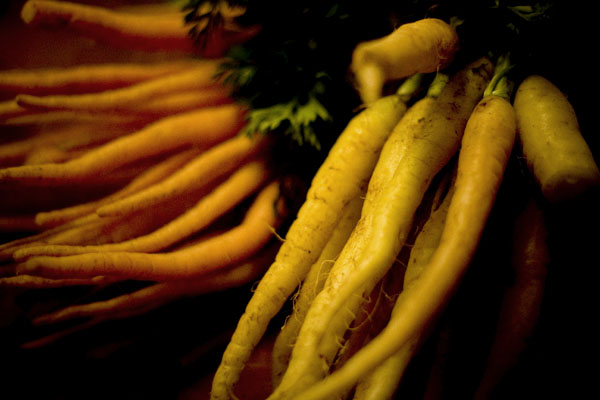
Prior to our chance reunion at the market, carrots and I had been on the outs for some time; I had been finding the gigantic, luridly orange specimens available in my neighborhood a bit...shall we say...disappointing. Tough, bland, resistant to softening when cooked and requiring entirely too much chewing, they were everything that was wrong with the vegetable kingdom. I was so scarred, I had no intention of even looking at carrots; I certainly wasn't anticipating falling head over heels in love with the tiniest, most elegant, most alluring carrots I could ever imagine.

bunched

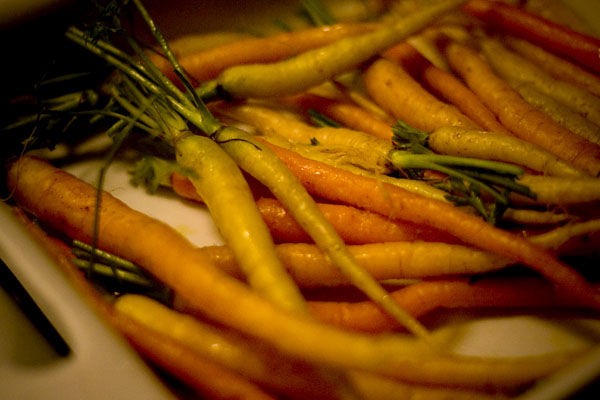
Had I not gone to the market that day, I might never have attempted this dish. But, you know. Love is funny, and fortuitous. I found myself trundling home with a pound and a half of delicious carrots, a small jug of maple syrup, and a dream. I think this dish would be an excellent addition to the Thanksgiving table--it's earthy, sweet, autumnal, and if the carrots are young enough you don't even have to peel them (and I am all for any recipe that means I don't have to peel the root vegetables)!

trimmed

Spicy maple-glazed roast carrots

1 lb of the youngest, tenderest, most slender carrots you can find, greens trimmed
½ c pure maple syrup
1 tsp ras-al-hanout* (you can also substitute garam masala if need be)
olive oil
salt
  1. Preheat your oven to 350 degrees Fahrenheit.
  2. In a shallow roasting dish, spread out your carrots, drizzled with olive oil and salt. Toss to coat. Roast for about 20 minutes, or until just tender.
  3. Meanwhile, make the glaze by combining the maple syrup with the ras-al-hanout.
  4. Remove the carrots from the oven; baste liberally with about half the glaze; put it back in the oven for another twenty minutes (basting again once or twice during this time).
  5. At this point, the carrots should be quite tender and delicious; give them a quick blast under the broiler to caramelize the glaze—be very careful not to let the glaze burn!
Serve with all manner of delicious things; this time, I chose Pomegranate chicken (which I will write about--don't worry!).

*Ras-al-hanout is a middle eastern spice blend which is jokingly said to translate to "everything but the kitchen sink." Most purveyors are tremendously secretive about their blends, and no two are alike. I'm partial to the blend from the Formaggio Kitchen; I get it at the Essex street market, but if you're not in New York, you can get it here.

Tuesday, October 21, 2008

Quick Roast Tomatoes for Procrastinators


There's a reason everyone was talking about slow-roasted tomatoes. Starting with Molly's article in Bon Appetit, and then the Amateur Gourmet, and the Wednesday Chef, and then, as these things often go, everyone. I was a little slow on the uptake—I kept meaning to buy those last roma tomatoes in the farmer's market, I kept meaning to set aside a Sunday for slow-roasting. These tomatoes have been on my mind.

But I didn't follow directions. Here we are, weeks later, and I didn't buy those tomatoes. It's gotten cold for real. Our heat isn't working yet (I think the thermostat needs batteries—you're on that, right, Matt?) and I may dig out a hat for my walk to work tomorrow. But we didn't miss our chance—even procrastinators can have roast tomatoes for dinner.

Realizing that my time was running out, I grabbed a container of grape tomatoes at Trader Joe's. They would have to do. (Did you know TJ is selling Hatch chilies now? I got a bunch of those, too, for later.) I didn't follow Molly's recipe—I actually didn't look it up again tonight before cooking. There wasn't time for slow roasting, though I'm sure slow roasting is sublime and concentrates the flavor in a way that this didn't. But this quick and dirty effort to conjure up some of the flavors that everyone's written about was absolutely a success. Soft, sweet, and velvety. Stirring a bit of fresh goat cheese into the sauce upped the luxury factor, mingling with the tomato juices and coating the strands of bucatini lightly. It was shockingly quick and shockingly good.

Sneak this one in. You still have time.


Bucatini with Quick Roasted Cherry Tomato Sauce
Serves 2

1/2 lb bucatini pasta
1 lb cherry or grape tomatoes, cut in half
olive oil
pinch of kosher salt
pinch of sugar
fresh herbs (about a tablespoon, ripped up...I used rosemary, oregano, sage.)
freshly ground pepper
2 tablespoons soft goat cheese
1 or 2 slices proscuitto, cut into 1-inch pieces
pecorino for grating on top

Preheat oven to 350. Spread halved tomatoes evenly in a baking pan, sprinkle liberally with oil and herbs, stirring to coat. Add salt, pepper, and sugar evenly. Bake 30 minutes, stirring every 10 minutes or so. In the meantime, cook pasta to al dente and drain, retaining a tablespoon or two of pasta water. When tomatoes are cooked, add proscuitto, pasta and reserved pasta water to the baking pan. Stir in goat cheese, mixing the sauce together to get a light coating on the bucatini. Serve with grated pecorino and extra pepper.

Sunday, October 19, 2008

Easy Brunch Dish: Kitchen-Sink Frittata


Sunday breakfast was always observed in my house growing up. My mom made eggs (fried or scrambled with herbs), my dad toasted bagels, and fresh orange and grapefruit juice was squeezed. With the New York Times and the Oregonian scattered across the table, we read and ate and enjoyed the sunlight streaming through the dining room window.

Brunch in our apartment is a more haphazard affair. Sometimes it's just us, but sometimes we invite a whole crowd, and (shhh—don't tell my mom) drinking is involved. I've tried many different brunch recipes, but the best ones come from Marc Meyer's Five Points brunch cookbook. (I've just added the book to our Amazon widget on the right side of this page.) Brunch at Five Points is a real treat, but these recipes allow you to churn out pretty much the same thing at home for a fraction of the price.


Marc Meyer's frittatas are crisp and quite thin. The basic recipe has you sauté your fillings, then add eggs and cook on the stovetop until the underside solidifies. Then throw in the broiler or oven to cook through and crisp the top—it's really easy. Most importantly, frittatas are an easy way to use up whatever's in your fridge—greens, mushrooms, cheese...you can add herbs or olives, etc, etc. To lighten it up a bit, I sometimes use egg whites for some of the eggs—it's important that there are enough eggs to wrap your fillings a bit, so a few extra egg whites can help with the volume without the dish leaving you comatose on the couch all day (those mimosas may be another story.) These multiply well—use a bigger pan, more eggs, more veggies, etc. Keep it thin, though—the final product should be less than an inch high.


Kitchen-Sink Frittata
Adapted from Marc Meyer

Olive Oil
About 2 cups greens or veggies (today I used onions and kale, but mushrooms, tomatoes, really anything will work.) You can also add fresh or dried herbs.
Meat (optional—half a sliced sausage, a chopped up piece of proscuitto, bacon, etc.)
about 1 cup cheese, grated or crumbled (I did a mix of asiago and goat cheese, but the sky's the limit)
Eggs (for two people, I used 2 eggs and 4 egg whites, but it depends on the size of your pan and the amount of your vegetables. Be ready to use 8-10 eggs if you're feeding 4 people.)
handful of panko
freshly ground pepper

In a cast-iron pan, sauté meat if using (though for proscuitto I would leave it as is and add later.) Add vegetables, cook through. Beat eggs lightly with cheese. Preheat broiler. Pour eggs into pan and smooth around so it's evenly distributed and there are no areas without eggs. Cook on medium heat for a minute or two until the bottom is slightly set. Sprinkle panko (or parmesan) on top, broil for 4 minutes or so, moving around to brown evenly. Top should be golden. Slice and serve.

Tuesday, October 14, 2008

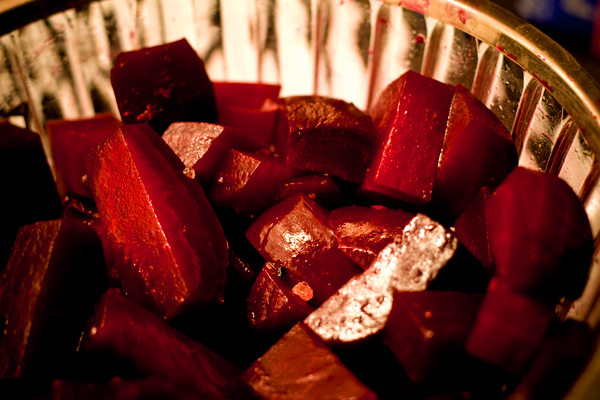
Give beets a chance: Simple beet salad.

jeweled

In Tom Robbins' Jitterbug Perfume, all the characters are (in one way or another) having a love affair with the beet. Most of them don't even realize it; they haven't fallen for the humble vegetable's more obvious charms--the silken flesh, the exquisitely agonizing color, the sweet and earthy taste. Instead, they are unwittingly under the spell of the beet's lesser-used and extremely fragrant pollen, which is apparently the great secret of everlasting life.

Much as I'd love to live forever, I think I'll leave the pollen for the characters and stick with the beet itself. Not only do I find myself drawn to the nearly obscene red finery, but i'm a little in love with the names of the different varietals: Burpee's Golden! Will's Improved Blood Turnip! Albina Veradura! Beta Vulgaris! Don't they just sound like a cross between your crazy aunt and her man-eating tentacula plant?

beetsfromspace

With visions of that strange mental picture dancing in my head, I set about making a simple beet salad for Sunday's supper. Seriously, seriously simple. Three ingredients simple. And perfect for a transitional fall night--tangy, creamy, velvety...and guaranteed to stain anything it comes into contact with, so really and truly: try to have some latex gloves on hand while handling these things. Unless Lizzie Borden is your new fashion statement, that is.

Bingo Pajama would approve.

deliciouslybeety

Seriously simple beet salad

4-5 medium sized beets (about the size of your fist)
Goat's cheese (a nice creamy chevre, ideally. I used what was leftover from the figs)
Balsamic vinegar
  1. Preheat oven to 400 degrees; wrap your beets firmly and individually in foil. When the oven hits temperature, pop in the beets and roast them for about 45 minutes, or until soft. DO NOT peel them first. Doing so will deprive you of the fun part.
  2. When the beets are done, let them cool until they can be handled comfortably. Snap on your latex gloves and rub the skins off. It will look gory. I am not kidding about the gloves.
  3. When peeled, cut them into 1-inch chunks (or so), swish them around with some balsamic vinegar (according to your personal taste). Some salt and pepper, too, if you're so inclined. Then, crumble the goat's cheese on top and you're in business!
I know beets aren't everyone's cup of tea, but i do encourage you all to try this, at least once.

Wednesday, October 1, 2008

onions for dinner


They were just so cute, and I'd just seen the recipe for Balsamic Glazed Cippoline on Smitten Kitchen. Since Matt considers vinegar to be an essential food group, I knew I had to try it.

They cooked up nicely (though the peeling took a long while) and the sauce thickened (with the help of half a cup of spaghetti sauce—brilliant!) to a gloriously rich goo. I seared up a little steak, which we served on polenta with the onions and sauce on top.


The reduced vinegar sauce was velvety and delicious. Accenting the steak perfectly, it mixed with the juices and brought out a sweet tang in the dish, reminding me of demiglace or some other high-effort sauce.

By the end of the meal, though, we both were sort of onioned out. It was a lot of onions, no matter how cute and delicate they were. But I would make the sauce again—maybe with a mix of onions and mushrooms? Sweet and sour portobellos? On lamb? Or salmon, even?


Here is the recipe, adapted from Mario Batali by the amazing Deb at Smitten Kitchen.

Thursday, September 25, 2008

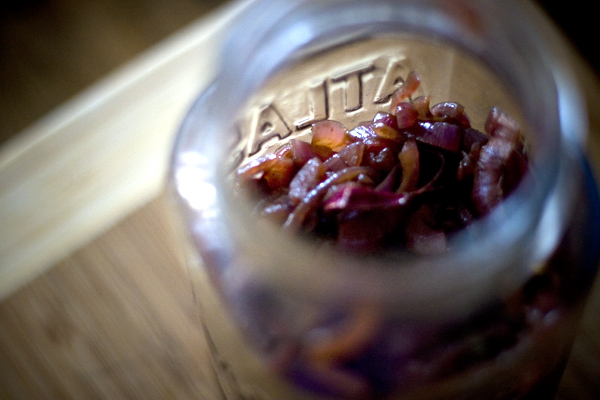
Your new secret weapon: Sticky Onion Relish.


Okay. Enough of that photographic navel-gazing! "Back to the recipes," I hear you clamor! And I, dear reader, humbly live to serve. So, today, I offer up to you one of my favorite culinary wonder-workers: sticky onion relish. Sweet, tart, tangy, and versatile, this delightful condiment is a workhorse, a multi-tasker that can help elevate even the humblest meal to unparallelled levels of awesomeness.

And did I mention it's ludicrously easy to make?


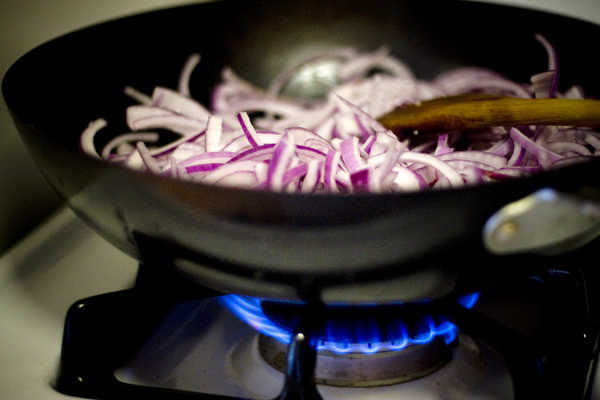
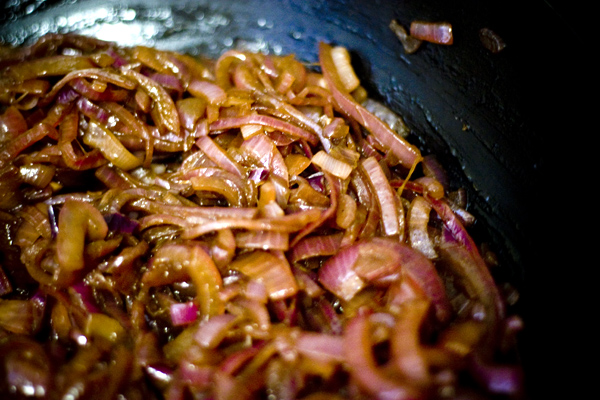
The trick to sticky onion relish is simply patience--what you're doing is not so much cooking the onions as melting them in a luscious sangria of butter, honey, and balsamic vinegar, elevating the onion to new levels of decadent richness. Like the pork, the key phrase at play here is slow and low.


I try to keep a jar of this miracle elixir on hand at all times--it handily jazzes up scrambled eggs, adds a rich sweetness to a tomato sauce, and even ups the elegance factor of the humble turkey sandwich. (I also recommend it with a chunk of good sharp cheddar for a quick afternoon pick-me-up). It stores well in the fridge, and never fails to make even the simplest meal look tremendously impressive.

if i had to make it a metaphor, i would describe it as high heels for your pantry.

Sticky onion relish

4 medium-sized red onions, sliced thinly
3 tbsp salted butter
1/4c balsamic vinegar
2 tbsp honey
  1. In a deep skillet, melt 2 tbsp of butter over low heat.
  2. When it's melted and starts to bubble slightly, add the onions. Saute, stirring occasionally, until the onions are translucent and aromatic.
  3. add the third tablespoon of butter.
  4. When the butter melts, add the balsamic vinegar. Stir constantly until the vinegar is entirely absorbed--the onions will smell amazing and start to appear creamy.
  5. Add the honey; continue to stir constantly until the onions are soft, creamy, and divine. You will probably know by the smell
Store in a jar or container with a tight-fitting lid; it should be quite happy in your fridge for up to three months.

Tuesday, September 23, 2008

hitting summer's snooze button


One last plate piled with tomatoes, a few more leaves from our balcony basil plant...Before it turns to October, to baked squash and roasted cauliflower—nothing against roasted cauliflower, seriously, I love the stuff—one more night of tomatoes. They were luscious with a few slices of fresh mozzarella, coarse ground pepper, good olive oil, and a splash of balsamic.

I also served up the last of this summer's sweet corn chowder. You could still make this—there's still corn at the farmer's market. Or file for next August. I adapted the recipe from Leite's Culinaria for a dinner party and froze the leftovers.


I used turkey bacon because some of our guests don't eat pork, but I'm sure bacon or guincale would be fabulous. I didn't have enough chicken stock to double the recipe, so I also made a quick corncob stock by boiling the cobs in water for about ten minutes. I used local Ronnybrook 2% milk, though cream would be good. Finally—and this is important—I did not cook the corn kernels with the potatoes. Good sweet corn needs almost no cooking. I added half the raw kernels to the potato mixture, letting them sit a minute with the burner off before whizzing them up with my immersion blender, then added the rest of the corn. The soup is quite sweet, and delicious with a salad of bitter lettuces if you've had enough of tomatoes by this point. I don't blame you. But just think how you'll feel in December...

Friday, September 19, 2008

an embarrassment of riches


Life (at least from a vegetable standpoint) may never be quite this easy again. You see, the Union Square farmer's market is right in the middle of my walk to and from work. It's a fabulous market. It even has its own blog. I think that after a few years of low-paying publishing jobs, shopping for fresh food has fully replaced any urges I might have had to keep up with fashion. Even if I have no plans to cook, I can't walk by without admiring (and buying) those perfect peaches, a bag full of multicolored string beans, and local scallops from the fish stand. (Not sure my officemates appreciate that contribution to our shared fridge.) In addition to Monday, Wednesday, and Friday, the Union Square market is open on Saturdays (though it's a zoo) and there are two other local farmer's markets open on Tuesdays, and Sundays, respectively. So yes, there's a farmer's market in my path every single day—except Thursday.

That's where the CSA comes in. When I saw that the new Downtown CSA held its pickup on Thursdays, I couldn't resist. But I'm going to be honest. For someone who walks to work
through a farmer's market almost every day, I'm not sure it's an ideal arrangement. I feel a ton of pressure to cook everything that is perishable on that first night, but sometimes these things don't really go together! We share our share with another couple, so CSA night is a great excuse for a dinner party. But there have been funny menus—one night I did an entire dinner of bruschetta: bruschetta with beets and goat cheese, tomatoes and basil, beet greens and cannellini. It was good, but kind of a lot of bruschetta. Sometimes, Thursday night rolls around and all I can muster is salad and pasta...the vegetables just keep coming...

I'm not sure if I'll continue the CSA next year. Some of the produce has been extraordinary—the cherry tomatoes were sweeter than any others I have tasted. It's a really friendly community, which is exciting to find in New York. I like contributing directly to an organic farmer, and I know that providing them the money up front is very helpful. But I like interacting with farmers every week
at the Union Square market, too, and I like waiting for cooking inspiration to strike me there. I guess it's not such a bad dilemma.


Quick Baked Ziti with Greens and Hot Salami
I had no plan for this week's vegetables until I stopped by Russo's, a local Italian market, on my way back from the CSA pickup. They had samples of hot salami out to taste, and it seemed the perfect accent for the giant bunch of tatsoi. Mixing different kinds of greens balances the flavor. You could also add white beans to this for a bit more protein.

Serves five, or four plus tomorrow's lunch.


1 lb ziti (I used DeCecco)
1 large purple onion, sliced
3 small green peppers or italian frying peppers, sliced
1 clove garlic—or more if you like it
1/4 lb freshly sliced spicy salami
1 small serrano pepper, sliced
1 large bunch greens (I used tatsoi) torn into pieces
1 smaller bunch different greens (I used spicy mustard greens) torn into pieces
1 T assorted fresh herbs (oregano, thyme, sage)
1 T fresh basil
1/2 lb ricotta
1/2 lb other cheese: fresh mozzarella, asiago, parmesan
2 cups milk
salt
pepper
handful of panko or breadcrumbs

Cook ziti until VERY al dente (maybe 3/4 of the way done.) Reserve a bit of the pasta water. Meanwhile, saute onion with a little olive oil in dutch oven until quite soft, add sliced pepper, garlic, salami, and serrano and saute a few more minutes, stirring. Add greens and a half cup or so of pasta water and saute/steam until slightly wilted—don't cook all the way, since this is going in the oven. Turn off burner. Stir in herbs, cooked pasta, ricotta, milk, and half of the other cheese until evenly distributed. Top with the rest of the cheese, salt and pepper to taste. Scatter breadcrumbs over the top. Pop in a 350 oven for 30 minutes. Serve with salad.

Bonus mystery vegetable.
Guess what this is?
I swear that's its natural color. And it's not a tropical fruit.