Wednesday, December 31, 2008

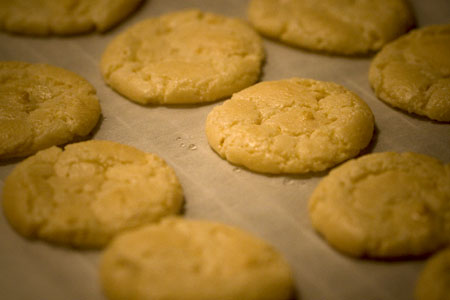
Cookie conundrum, part 1: Amaretti

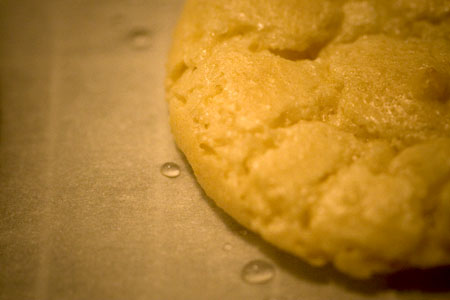
amaretti1

I almost didn't make these. I thought they were going to be ridiculously, ridonkulously difficult--I mean, they sell tins of these things at Balducci's for, like, $10 a pop! That must mean they're ridiculously scary and difficult! Despite my reservations, however, I was determined to avoid making a plain sugar cookie to represent half of the black and white ball; I was going to tackle these crazy confections if it killed me!

It, um, didn't. Clearly. In reality, I'm not sure these could actually have been easier.

Three ingredients. These things have only three ingredients. They also require only one bowl--the one on your food processor. The most complicated thing about them is the fact that you have to pipe them on to the baking sheet, and that's not so much complicated as just requiring a certain amount of precision (these cookies puff up exponentially in the oven, so you really want to make sure your batter drops are no more than 3/4 of an inch, or else you will find yourself with an amaretti sheet cake).

amaretti2

As an aside, these are the only cookies I've ever made that turned out to look exactly the way I'd anticipated (i.e., exactly like any store-bought variety, except better because it's homemade), if that gives you any sense of how easy this recipe is, and how formidable an achievement it will seem to your audience.

And thus, I declaim these cookies an excellent party food--they're elegant, delicious, store for days in an airtight container, and won't drive you crazy. You don't need to admit anything to your partygoers; let them think you slaved.

Chewy amaretti cookies
Adapted from Gourmet magazine, January 2009

1 (7oz) tube pure almond paste (not marzipan!)--roughly 3/4 c
1 cup sugar
2 large egg whites, at room temperature for 30 minutes
  1. Preheat your oven to 300 degrees F. Line rimmed cookie sheets with parchment
  2. Pulse the almond paste and sugar in a food processor until about the consistency of sand.
  3. Add the egg whites and pulse again until smooth.
  4. Transfer to a pastry bag and pipe on to prepared sheets in 3/4" rounds (1/3" high)
  5. Bake until golden and puffed, about 15-18 minutes, rotating the pan about halfway through.
  6. Cool cookies in pans on racks until COMPLETELY cool.

Tuesday, December 30, 2008

The jackpot question in advance: New Year's Eve.

So, I never actually got around to baking anything for the holidays. The spirit, as they say, did not move me (something about airports and snowstorms pulled the thunder from my kitchenaid). I'm hoping to turn the tides this week, having questionably decided to throw a New Year's Eve party!

The party itself is to be styled as a Black and White ball, so my initial plan was to make two cakes (one for each color). I then determined that that was more or less guaranteed to drive me utterly mad, given that the day job required at least some of my attention over the first few days of the week. So, instead I compromised on cookies--one dark (dark chocolate and crystallized ginger crinkles) and one light (amaretti). I have made neither in my lifetime--it's a whole new world of cookie!

I will keep you posted!

Monday, December 29, 2008

Something Nice: Spicy Molasses Gingerbread Cake


When we got back to New York, our apartment smelled a little stale. What better way to warm it up and celebrate being home again? Seriously, I would bake this one just for the scent. You probably already have the ingredients around, even if you've been out of town awhile. And a slice of spicy gingerbread cake just might make unpacking easier.

This improved overnight in the fridge, so I recommend making it the day before and refrigerating (tightly wrapped in saran + foil) for a day before serving. The ginger mellows and permeates the entire cake with a little rest.


Though it's lovely with whipped cream, you could also serve this for brunch with a dollop of greek yogurt and some sliced pears. It's quite spicy and not too sweet, surprisingly moist and rich tasting. The fresh ginger is easiest to mince if you store it in your freezer.


Spicy Molasses Gingerbread Cake
Adapted from David Lebovitz

just under 1/2 cup fresh ginger
1/2 teaspoon powdered ginger
3/4 cup molasses (I used blackstrap, which is quite strong.)
just under 1/4 cup maple syrup
1 cup sugar
1 cup vegetable oil (peanut is recommended, but I used canola)
1 cup water
2 tsp baking soda
2-1/2 cups flour
1 tsp ground cinnamon
1/2 tsp ground cloves
1/2 tsp ground black pepper
1/2 tsp unsweetened cocoa powder
1 vanilla bean
2 eggs, beaten lightly

Position the oven rack in the center of the oven. Preheat the oven to 350°F. Line a 9 by 3-inch round cake pan or a 9 1/2 inch springform pan with a circle of parchment paper, or butter the inside (I did this, and it didn't stick at all.) Place pan on a cookie sheet to prevent spills.

Peel, slice, and chop the ginger very fine with a knife (or use a grater or food processor). Mix together the molasses, maple syrup, sugar, and oil. In another bowl, sift together the flour, cinnamon, cloves, cocoa, and black pepper.

Bring the water to the boil in a saucepan, stir in the baking soda, and then mix the hot water into the molasses mixture. Stir in the ginger.

Gradually whisk the dry ingredients into the batter. Add the eggs, and continue mixing until everything is thoroughly combined. Pour the batter into the prepared cake pan and bake for about 1 hour, until the top of the cake springs back lightly when pressed or a toothpick inserted into the center comes out clean. If the top of the cake browns too quickly before the cake is done, drape a piece of foil over it and continue baking.

Cool the cake for at least 30 minutes. Run a knife around the edge of the cake to loosen it from the pan. Remove sides from the pan to serve.

Wednesday, December 24, 2008

Best Recipe of the Year: Mom's Cioppino


This is it.

This is the best recipe I have to offer in 2008, my vote for tastiest homemade entree we've had this year. (That goat cheese cheesecake was pretty darn awesome, too, but it's not exactly a balanced meal on its own.)

Cioppino is a tomatoey fish stew with a touch a fennel and saffron, green peppers and deep red wine. Traditionally, a fish stock was brewed with the heads and bones from the catch of the day, and fish cubes and clams, fresh shrimp, or other shellfish are added at the last minute. With each spoonful, I could picture the Portuguese or Italian fishermen who first cooked this onboard their ships along the coast of California. Perfect for a drizzly, cold day at sea (or on land), cioppino is meaty and warming, somehow both delicate and bold.

We used to make a seafood caesar salad every year on Christmas Eve, taking advantage of the Dungeness crab season. But you don't really feel like something cold that night, especially when the weather is grim, so several years ago my mom switched to cioppino for this occasion. Her recipe has evolved over the years, and it seems to be constantly improving.


I urge you to make this dish as soon as you can get your hands on some nice seafood—maybe for New Years? Feel free to play around with the fish a little depending on what's fresh—I imagine scallops could be added, or you could use grouper instead of halibut. This year we used salmon and red snapper, little manila clams and fresh, sweet shrimp. Cioppino is great dinner party food—totally impressive but you can easily prepare the soup base a day ahead, and just plop the seafood in when your guests arrive. Don't skip the garlicky aioli (sort of fake-oli since you start with a jar of mayo). The punch of garlic and creaminess stirred into the soup is essential.

Please don't fear the long recipe—it's really not a tricky one.

Mom's Christmas Eve Cioppino
(Adapted from from The New York Times Cookbook & other recipes)
10 servings


4 T olive oil
3 cups chopped onion
1 leek, trimmed, washed well, & finely chopped
2 to 4 cloves garlic, finely chopped
1 green, yellow, or orange bell pepper, cored, seeded, cut into thin strips
1 Yukon Gold or other small potato, halved and sliced, optional
2 sticks celery or one small fennel bulb, sliced, optional
4 cups chopped imported peeled tomatoes (canned, diced)
1 cup fresh or canned tomato sauce
1 small can tomato juice
salt, freshly ground black pepper
1 bay leaf
1/2 tsp dried oregano
1/2 tsp dried thyme
1 tsp dried basil
red pepper flakes
1/4 tsp saffron (or up to 1 tsp.)
1/2 tsp grated orange zest or 2 strips of orange peel
juice from one orange
2 cups chicken broth if making soup base ahead, or fish stock if finishing in the same day
1 cup water or broth
1 cup red zinfandel or white wine—use something decent!
1-1/2 to 2 lb. firm-fleshed fish such as striped bass, sea bass, halibut, or salmon cut into 2-in. pieces (2-1/2 lbs. for bone-in steaks, bones to be used for fish stock)
1 lb. raw shrimp shelled & deveined (wild fresh rock shrimp were superb)
2 doz. well washed small clams in shell
1/2 lb crabmeat or 1 hard shell crab, cooked in shell & cracked
1 qt chicken or fish broth to add as needed for desired consistency

optional seafood additions

1/2 lb bay scallops
1/4 cup shucked oysters in their liquor
1/2 lb lobster tail cooked in shell

Fish stock for approximately 4 to 6 cups
Buy bone-in fish steaks for the soup. Cut the meat into 2-in. pieces and refrigerate, putting all the bones and skin in a pot with an onion studded with 2 cloves, a carrot and celery stick (or fennel bulb trimmings) cut in pieces, bay leaf, and peppercorns to taste, and cook in water to cover (approx. 4 to 6 cups) for 2 hours.

Aoli
Mash 2 cloves garlic, chopped; add 1 cup mayo & squeeze of lemon juice.

Grilled Croutons
Thinly slice enough of a baguette on the diagonal for 2 pieces per person. Lightly brush each piece with olive oil and bake in 350° oven til crisp.

1. Cook onion & leek in olive oil, stirring often, until just lightly browned. Add garlic, green pepper, and celery or fennel if used & cook til they wilt. Add potato, if used, tomatoes, tomato sauce and juice, salt & pepper to taste, bay leaf, oregano, thyme, basil, saffron, and 1/4 tsp red pepper flakes. Add chicken broth (or fish stock if serving the same day) and orange zest or strips and juice & cook slowly for about 2 hrs, stirring often to prevent burning. More chicken or fish stock may be added if desired.

2. Add broth & wine and cook 10 minutes more. Soup may be made in advance to this point, or, if using fish stock, do this step 30 minutes before serving, just before step 3.

3. Twenty minutes or so before serving, return soup to the boil and add fish pieces (you will be adding seafood in order of how long it needs to cook—don't overcook!) Cook about 4 minutes and add scallops if used. Cook 3 minutes, stirring gently. Add clams, shrimp and other shellfish. If using fresh crabmeat instead of a whole crab, put it directly in individual soup bowls just before serving so that it doesn’t get lost.

4. Cook stirring gently about 5 minutes or until clams open. Serve in very hot soup bowls with a grilled crouton on each bowl, and aoli and red pepper flakes on the side. Stir aoli into each serving at the table.

Soup base can be made ahead and frozen; add fish stock, fish, and seafood after thawing.
Tuesday, December 23, 2008

Something Warm: Spicy Steak with Peppers


Oregon's Willamette Valley is known for mild, gray, and drizzly weather. It rains, yes, but it rarely snows. Perhaps once or twice every few years there will be a storm, sometimes with some dangerous freezing rain, but all is usually melted by noon. I didn't own a real winter jacket until I moved east in 2000.


This is my parents' patio. Don't think we'll be dining outside this visit.

Luckily, we stocked up on groceries on Saturday. The unsalted roads have been treacherous since then. So it's a homebound week for reading and drinking tea, wrapping presents, and giving Matt the opportunity to win handily at Scrabble. I'd be embarrassed at how often I lose, but he's really quite skilled at it. We've been taking long walks through the snowdrifts, monitoring the progress of each potential route out of the neighborhood. Tomorrow we hike to the store if there isn't a way to drive, though I bet we could survive another week on the contents of my parents' voluminous freezer.

We had planned some dinners out which we have had to cancel. Sad as I am to miss my glimpse of Portland's dining scene this week, my mother always has something good to cook. Like this recipe she found in the New York Times last year was a winner: thin steak rubbed in smoky paprika and cumin, grilled rare and piled with slightly caramelized onions, jalapeno, and sweet peppers. It's a bit like a spicy cheesesteak without the cheese. The perfect warm, filling bite after a long walk through the snow. Though I could also imagine whipping this one up in the summer and serving with an icy margarita, if that's your thing.


My mom served it on grilled bread as an open faced sandwich. The steaks were a bit thick, even after the butcher butterflied them, so she flipped the steak to cook the second side slightly. (The New York Times suggests cooking only one side, but they're working with a truly thin steak.)

Grilling required shoveling a path through the snow to the outdoor barbecue, which was a bit ridiculous, but you could make a credible version of this in a cast iron pan. Though you may want to disconnect your fire alarm first. If you happen to have a little cheese around, you could try turning this into a full-on Spicy Pepper Cheesesteak. I bet it would be awesome.

Happy holidays from the Wild West. I hope you are all warm and cozy wherever you are.


Spicy Steak with Wilted Peppers
Adapted from The New York Times

1 large skirt steak, about 2 pounds (we used New York Strip instead)
1 teaspoon smoked Spanish paprika
1 teaspoon ground cumin
Fine sea salt
1/2 teaspoon freshly ground black pepper
2 tablespoons extra virgin olive oil
2 cloves garlic, slivered
1 medium-size red onion, sliced thin
2 jalapeño chilies, cored, seeded and slivered
3 red bell peppers, (or a mix of red, yellow, and orange if available), cored and slivered
1 tablespoon sherry vinegar
1 tablespoon slivered fresh basil leaves.

1. Use a large, sharp knife to butterfly skirt steak (or have butcher do it) and cut into 4 portions. Combine paprika, cumin, 1/2 teaspoon salt and pepper and rub onto outer side (not cut side) of steak. Place spiced-side down on a platter. Set aside.

2. Preheat grill or grill pan to very hot. Meanwhile, heat oil in a skillet. Add garlic, onion, jalapeños and a dusting of salt and sauté over medium-low heat until soft. Add bell peppers, increase heat to medium-high and sauté until bell peppers just begin to wilt but are still slightly crisp, about 5 minutes. Remove pan from heat.

3. Grill bread until just barely toasted and place on platter.

4. Place steak spiced-side down on grill or in pan and sear, close to source of heat, 2 to 3 minutes, until just starting to brown around edges but still nearly raw on top. (If your steak is not super thin, flip steak and cook one minute on other side.) Transfer to a serving platter, seared-side down. Briefly reheat peppers, add vinegar and basil, stir, then pour over steak, spreading to cover meat. Serve over toasted bread.

Yield: 4-5 servings.

It's a Cass Blaster Blitzkrieg*: Chicken and mushroom casserole.

casserole1

It's hardly uncommon knowledge that I loathe the cold. What can I say? I grew up in California, and ten years in New York has done NOTHING to thicken my blood. I hate not being able to feel my fingers. I hate the fact that the MTA pretty much shuts down when the slightest flurry occurs. I hate that I cannot wear cute shoes and/or skirts out in the world between November and May.

I do, however, love cold-weather food. You know what I mean--the heavy, creamy, dreamy foods of winter, resplendent in cheese and bacon and all manner of things bad for your cardiovascular system. Comfort foods, designed to take your mind off the fact that half your band is still stranded in Las Vegas (not that I'd know about that *ahem*) and that you stopped receiving messages from your toes about three days ago: Pastas. Fondue. Casserole.

casserole2

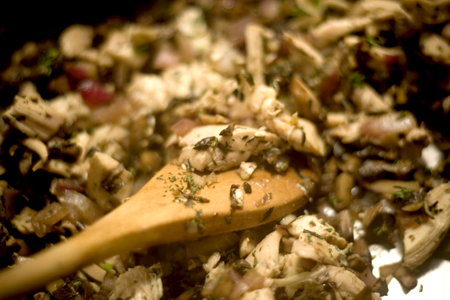
Oh, casserole. I was so late to your party, and I'd like to apologize now. I love you even more now that I've determined that you don't actually have to be a crazy cholesterol bomb to be both hearty and satisfying. I credit Heidi over at 101 Cookbooks for showing me the light--I stumbled across her recipe for mushroom casserole, and it was like a shot of adrenaline straight to the brain. Heidi's exquisite site is all about healthy and delicious, so I knew that if SHE was exhibiting it, it had to be both amazing and extremely unlikely to strike you dead. Plus, it's easy and versatile--it was no trouble to satisfy my inner semivore and toss in some cooked chicken (from a bird I'd roasted earlier), or to swap out the rice in favor of kamut (a variety of whole wheat) instead of rice (which I certainly recommend trying--it's chewy and unlike anything else). I also found myself without cottage cheese or sour cream, so I substituted in some plain yogurt (my new favorite ingredient). Basically, it's a good, basic recipe that stands up beautifully to whatever you wish to throw at it. Frankly, I suspect it would rule with a mushroom medley and a little blue cheese, or perhaps something involving bacon. I will let you know if i try this.

So! If you're looking for something to eat this winter that is hearty and healthy, I say give this recipe a go--but feel free not to follow it too carefully!

And, my darlings, this is probably my last post before the holidays; as you can see, I did not get it together to make any cookies or find any holiday spirit, but I hope you had better luck with that than I. I also hope that wherever you are, you are warm, you are safe, and you are with the people you love.

Happy holidays, y'all.


Chicken and mushroom casserole

Adapted from the always awesome 101 cookbooks.

2 tbsp fresh tarragon, chopped
2 tbsp fresh thyme
4 cloves garlic, minced
1 medium-sized onion, diced
8-10 oz mushrooms, finely diced
2 large eggs
1c lowfat yogurt
2c prepared rice or grain of your choosing
1/2 c + 2 tbsp parmesan cheese
1/2c breadcrumbs
Optional: 1c cooked chicken, cut into small chunks
  1. Prepare your grain; set aside in a nice, big mixing bowl.
  2. In a large saute pan, heat a glug of olive oil over medium to medium-high heat. Saute the mushrooms until they're brown and juicy; then, add the onions. Once the onions start to get translucent, add the garlic and saute for a couple more minutes.
  3. Turn off the heat, add the herbs.
  4. Meanwhile, add the eggs to the yogurt, blending well.
  5. Add the egg-yogurt mix (or rather, as much of it is needed to bind the other ingredients--you don't want this thing too wet), mushroom-onion mix, 1/2 c parmesan cheese, and chicken to the rice; mix well and then turn it out into a lightly buttered casserole dish.
  6. Preheat your oven to 350. Then, mix the breadcrumbs and the remaining parmesan cheese (and some more herbs, if you're feeling festive) together; sprinkle this mixture liberally atop the casserole.
  7. Bake covered for 20 minutes, then uncovered for 20.
* The first person to identify that quote gets a special prize (besides my undying respect and devotion, that is)! Leave your guess in the comments.

Sunday, December 21, 2008

Snow and Crabs (No, Not Snow Crabs)


Greetings from the wild west.

We've gotten inches and inches of snow, and may well be trapped in the house for the duration of our holiday trip. They don't salt the roads out here, so you can stand at my parent's front window to watch the cars slide down the hill sideways.

But you could do worse than sitting at my mother's table with a giant Dungeness crab in one hand and a cracking utensil in the other. It's sort of a messy business, requiring a shower afterwards, but an incomparable treat. I've been to Baltimore, and I know they like their crabs, but these big guys are the real thing as far as I'm concerned.


Happy holidays—I hope you're not stuck in an airport somewhere.

Tuesday, December 16, 2008

Overcoming a fear of poultry, Part 2: Herbed tzatsiki chicken.

TzatsikiChicken1

When it comes to certain things, I'm a bit of a slow study. On this list: playing the trumpet. Speaking German. Baking bread (as you've probably already realized). Experimenting with herbs.

I know, I know. Herbs are great! Herbs are your friend! Well let me tell you: when I learned how to cook, I went from burning pots of water to cooking acceptable meals in about two months (I was in college, I was a kept woman; it's not like I had anything else to do); my haste to learn--and not kill us all in the process--was so great that I seriously glossed over some of the basics. Like, you know. How to flavor my food. For years, the only herb I had any clue how to use was basil. I could make eighteen types of stir fry, but I couldn't identify tarragon in a lineup. It took ages before I could even handle sage; longer still before I invited rosemary to the party. Now, many moons later, I also count among my friends thyme and oregano (and I'll fully admit that i still have no idea what to do with tarragon). Thank goodness; making random things out of what I find in the fridge has become much easier since I've started to foxtrot with herbs.

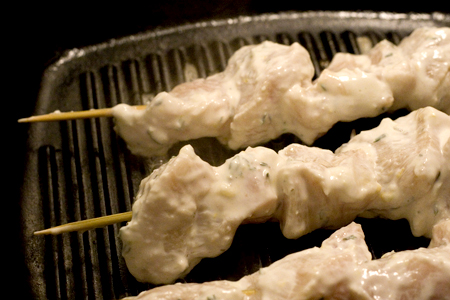
Example: Last week, I found myself with three lemons, a shedload of garlic, some greek yogurt and my newly requisite freezerful of herbs. Having discovered not too long ago that plain yogurt is a kick ass marinade for chicken, it seemed like a no-brainer: grab some poultry, some skewers, and whip up a greek tzatsiki-style marinade! I'd be hard pressed to think of a quicker, easier way to inject a small dose of summer sunshine into a dreary December evening.

TzatsikiChicken2

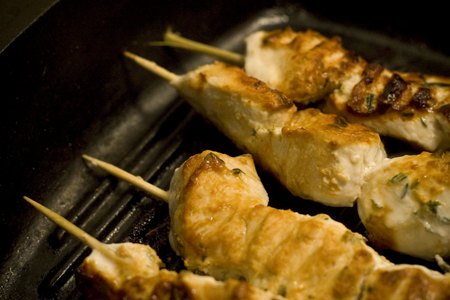
Because I'm lazy, I put this garlicky delight together using my food processor, which reduced prep time to approximately three minutes--including the chopping of the herbs--so it's definitely a great meal for a weeknight (though you can marinate the chicken for up to three days, and it gets better with every passing second). Easy, healthy, and tasty, I'm chalking this one up in the "Epic Win" column on my Adventures in Poultry spreadsheet.

Herbed tzatsiki chicken

Approx 1lb boneless, skinless chicken breasts, cut into approximately 2-inch cubes. Thighs would also work; I just went with what was on special.

Marinade:
5 cloves garlic
1c greek-style yogurt (I used lowfat)
2-3 tbsp fresh thyme, removed from the stem
2-3 tbsp fresh rosemary, chopped
zest from 2 lemons
1tbsp olive oil
pinch salt
  1. Make the marinade: whizz everything except the chicken together in your food processor until it's a lovely, green-flecked and aromatic paste. If it's too thick, loosen it up with a little water.
  2. Combine chicken and marinade in a large zip-top bag; set it in your refrigerator to marinate for at least one hour and up to three days.
  3. Thread on to bamboo skewers that have been soaked in water.
  4. Fire up your grill (or your grill pan) to a medium to medium-high heat and cook those suckers for about 8 minutes. Turn the skewer every two minutes or so to ensure even coloring all around.
Beware: I like this SUPER garlicky; you might want to reduce the amount of garlic, as it will stick with you for a day or two. But, if you prefer to keep vampires at least ten feet away (as I do), go crazy!

Sunday, December 14, 2008

Say it's your birthday: Malted Milk Cake

cake3

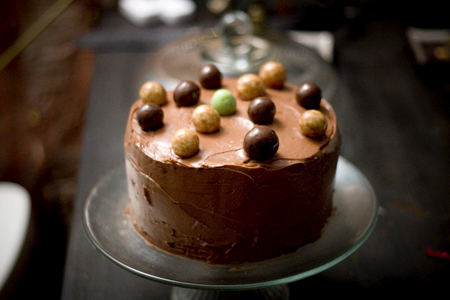
Today is Bench's birthday! Saturday was the wonderful A's birthday! If I've ever had a better reason for baking a cake, I can't think of it! (Okay, so, maybe there was ALSO the tiniest bit of an ulterior motive--I got my hands on the Baked cookbook the second it came out, and have been dying--DYING--to take it for a test drive.) I floated the idea past Bench, with the proviso that he select the cake that I would attempt. Clever lad that he is, he accepted the challenge readily. After much deliberation, the decision was made, and the Malted Milk Cake gauntlet was thrown.

A few notes on the cake itself: the boys from Baked are very careful to tell you that white cakes are very delicate (something I did not actually know, having not ever made a white cake before. Yes, I know.), and that freezing the layers for a spell before frosting them might be a good idea. Seeing how enthusiastically the cake stuck itself to the parchment, the pans, the COOLING RACK (resulting in some rather nasty-looking divots in what became the middle layer--thank goodness frosting hides most ills), it seemed like an extremely sensible idea. I recommend it highly, as these cakes are fragile little buggers before they've had a bit of a chill. I personally decided to be an extremist and freeze them overnight, moving them to the refrigerator the next morning.

cake1

Another thing that the boys from Baked recommend is that you level off each layer of cake with a knife before assembling the cake; I'm going to come out and say that unless the workings of your inner ear could double as a level, you should probably skip that part. Seriously. I considered trying it and then remembered what happens when I try to split english muffins--let's just say that the problem would be considerably worse by the time I finished. I did take a serrated knife to the sides, just to even them out, but you can skip that part, too, unless it would bring you personal satisfaction. My feeling is: if you're baking a cake for someone and they call you out on aesthetics, they are clearly missing the point of your labor of love and you should probably just keep it for yourself. Or make them wear it as a hat. Whatever.

The frosting was quite fun, in that it was my first stab at buttercream in, oh, let's say, ten years. Thank goodness I'd had some recent exposure to Good Eats' episode on the stuff; thanks to the magic of Alton Brown, I knew more or less what to expect, and had in my back pocket the best advice you'll ever hear about buttercream: add the butter one piece at a time, waiting for it to incorporate completely before adding the next piece. It is time consuming, but totally worth it, as you walk out with a gorgeous, silky frosting (though, really, anything with a full pound of chocolate in it is going to be pretty splendid no matter how you slice it).

Despite the profusion of chocolate, I will admit: this was not my favorite frosting recipe (I have now confirmed what I have long suspected--I am a cream cheese frosting kind of girl). It worked tremendously well with the cake, however, as the robust, not-too-sweet density of the frosting was a perfect foil for the delicate dreaminess of the cake. As someone who typically regards cake as a vehicle for frosting, it was definitely a new experience to be more excited by the cake itself.

Frosting aside (and really, there was nothing wrong with it; it just wasn't my cup of tea), I still count the whole endeavor as a success: not only was it it was my first white cake (and my first triple-layer cake!), but it was a tremendous excuse to have a couple of my favorite people over, drink sauternes and anything else we could get our hands on, and determine that suspenders are better than xylophones. And at the end of the day, isn't that the whole point of baking? Win!

Malted milk cake
Excerpted from Baked, the cookbook. It is awesome and you should go buy it immediately, because this recipe is just the beginning of its amazingness. You should also try their chocolate babka if you ever make it to the bakery itself. Or a cinnamon chip scone. Trust me.

For the cake:
2 1/4 cups cake flour
3/4 cup all-purpose flour
1 cup malted-milk powder
1 tablespoon baking powder
1/4 teaspoon baking soda
3/4 teaspoon salt
1/4 teaspoon freshly grated nutmeg
1 stick unsalted butter, at room temperature
1/2 cup solid vegetable shortening, at room temperature
2 cups sugar
1 tablespoon pure vanilla extract
2 cups ice water
4 large egg whites, at room temperature

For the frosting:
10 ounces bittersweet chocolate, finely chopped
10 ounces milk chocolate, finely chopped
1 3/4 cups heavy cream
3 tablespoons light corn syrup
4 sticks (1 pound) unsalted butter, cut into 1-inch chunks, softened
  1. MAKE THE CAKE: Preheat the oven to 325°. Butter and flour three 8-inch cake pans and line the bottoms with parchment paper. In a large bowl, whisk the flours with the malt powder, baking powder, baking soda, salt and nutmeg.
  2. In the bowl of a standing electric mixer fitted with a paddle, beat the butter with the shortening until creamy. Add the sugar and vanilla and beat at medium speed until fluffy, about 3 minutes. Beat in the dry ingredients in 3 batches at low speed, alternating with the ice water, occasionally scraping down the side of the bowl.
  3. In a clean bowl, beat the egg whites at medium-high speed until soft peaks form. Fold the egg whites into the batter. Divide the batter between the pans, spreading it evenly, and bake the cakes for 40 to 45 minutes until a toothpick inserted into the center comes out clean. Let the cakes cool in the pans for 20 minutes, then invert them onto a rack (note: it might be worth putting a piece of parchment paper on the rack first, otherwise you might lose a bit of the cake to the grid of the rack, as I did) and let cool completely. Peel off the parchment. (A tip: Wrap the individual layers in foil and freeze them for at least an hour before even attempting to frost them. You will not regret this.)
  4. MEANWHILE, MAKE THE FROSTING: Place the chocolate in a large bowl. In a small saucepan, bring the cream to a boil, then remove from heat. Add the corn syrup; immediately pour the mixture over the chocolate. Let stand for 2 to 3 minutes, until the chocolate has melted, then whisk until smooth. Let cool to room temperature.
  5. Transfer the mixture to the bowl of a standing electric mixer fitted with a wire whisk. Gradually beat in the butter at medium speed, a few chunks at a time, and beat until thoroughly incorporated between additions. The frosting should be smooth and silky. Refrigerate the frosting just until it is thick enough to hold its shape, 10 to 15 minutes.
  6. Place one cake layer on a serving platter and spread 1 1/4 cups of the frosting over the top in an even layer. Repeat to form 2 more layers. Spread a thin layer of frosting over the side of the cake and refrigerate briefly until firm. Frost the side with the remaining frosting. Garnish the cake with malted-milk balls and refrigerate briefly to firm up the frosting before serving.
  7. Remember to share. You will be sorely tempted to keep it all for yourself.

Saturday, December 13, 2008

Frankies Spuntino's Cavatelli with Brown Butter, Sage, and Faicco's Hot Sausage


Frank Bruni outed our favorite restaurant last week in the New York Times. It was hard enough to get into Frankies Spuntino before the article. Now, good luck!

Still, I urge you to go to the restaurant. I urge you to put your name in (they won't take reservations, and won't take your name over the phone—they have to "see the whites of your eyes," they once told us), grab a drink at the cheap bar down the block, and bide your time until you can order this pasta. Go ahead and order the antipasto plate with its delicately sliced prosciutto and lovely roasted vegetables, but don't skip this cavatelli. It's hot and spicy and rich, perfectly al dente. We devoured it (for the umpteenth time) the night we got engaged, late after calling our families to spread the news and tipsy with champagne and the sparkle of Matt's great-grandmother's ring. But it's really great on an ordinary day, too.

Today, walking around in the cold winter sun after a stop at the Strand, I steered myself westward. Faicco's pork store, where Frankies gets its sausage, is a worthy destination. Even if its 28 degrees out. Not only do they make terrific sausage, but they sell a variety of fresh and cured meats as well as imported canned goods and pasta. I picked up a braciole (pre-rolled!) for Sunday Ragu along with the craveable spicy sausage. I harvested the last of our sage, though we could have added more, since the sage loses its bitterness in the sauce and really is an essential flavor in the dish.


The elements of the recipe are simple: short, stubby cavatelli (ideally fresh, though I substituted another short dried pasta), brown butter, sage, and sausage. A little garlic. The sausage infuses the sauce with savory heat. I'll continue to tweak when I try this again, but here's the gist:


Cavatelli with Brown Butter, Sage, and Hot Sausage
Inspired by Frankies Spuntino (if only they would give me their recipe!)
Serves Two


1/2 pound cavatelli or short pasta
3 links hot sausage (I heartily recommend Faicco's if you're in New York.)
3-4 T butter
1 cup sage leaves. Don't be stingy.
3 cloves garlic, chopped
parmesan, salt, pepper for serving

Bring water to a boil. Brown sausage, whole, until mostly cooked. Remove from pan and slice into coins. Cook pasta according to package directions—do NOT over cook, pasta should be quite al dente. Meanwhile, add butter to the pan, cook over moderate heat about 5 minutes until beginning to color. I may have stopped too early, this should get quite nutty. But do not burn! Add sage leaves and garlic, cook for a minute to infuse flavors. Return sausage to pan, toss. When pasta is cooked, drain and add (along with a few tablespoons of pasta water), cook for a minute over low heat, stirring. Add salt and pepper to taste, serve with parmesan and red wine.

Thursday, December 11, 2008

Is it Last Minute Already?

Photo from Amazon.com

Whether it's "last minute" yet or not depends on your personality...do you thrive in malls teeming with shoppers? Or do you prefer making a list and checking it off in the warmth of your own home, where you can control the soundtrack?

You still have a few days left to order Christmas gifts and get Amazon free shipping, though Chanukah is a little earlier, starting on the 21st.

There are some deals to be had. Case in point: the Silpat, pictured above. People love these things. Usually around $20, they're on special for $10 right now. Or, gift yourself a few of these, and use for homemade treats (praline? yes!) to give away (or keep!) We've added a link to it in our Amazon widget below, along with other kitchen goodies we know and love.

While you're at it, please support the publishing industry. We're struggling a little around here. A few recommendations: All About Braising by Molly Stevens. Throw in a Lodge Enameled Dutch Oven for an amazing gift! And if someone you know doesn't already own Marc Meyer's brunch book, do them a favor and get it for them. If you'd rather order from Barnes & Noble, enter code D9E4E3T for 10% off until Dec 18th.

More gifts addendum!
While we're at it, how about a set of pretty measuring spoons with a handwritten cookbook of your favorite recipes? Or a silicone whisk to prevent scraping enamel cookware. We just received these gorgeous pepper and salt mills and we LOVE them.

Lighter Bite: Buffalo Salmon


Is it possible I still feel stuffed from Sunday brunch?

Craving something lighter and zingier and fresher, I knew we'd have a big salad for dinner Wednesday. But as I was clicking around, I remembered this recipe I'd cut out a long time ago. I was introduced to Frank's Hot Sauce at a Superbowl party last year, and have been a little obsessed ever since. It's not very spicy—that's not the whole point—it's mostly vinegary. It's classic on fried chicken wings but possibly even better on grilled or broiled ones, so I was up for the experiment. Why not salmon?

Answer: because salmon is not chicken. It's possible we should treat our chicken like chicken and our salmon like salmon. The buffalo sauce and fish were incongruous, the taste of salmon made me crave a sweeter sauce (I promise to post about my mother's classic soon), and the taste of Frank's made me crave chicken. It was a mismatch.

Whether you try this (and it could just be an acquired taste) or just pour some lovely Frank's Hot Sauce on some cooked chicken, I do have one recommendation. Pair it with a nice salad: arugula tossed with slightly steamed asparagus, a bit of crumbled feta, and a citrus vinaigrette. Perfect and light.

You'll recover from last weekend just in time to start planning the next one.


Buffalo Salmon (unencrusted)
inspired by Gourmet Magazine
serves 2

1 lb salmon or arctic char (char might actually be better)
1/2 cup Frank's Hot Sauce + 2 T
olive oil

Preheat broiler. Pour hot sauce in a baking pan place salmon in it, turning to coat. Remove any bones you notice. Let marinate 1 minute. Heat cast iron pan over medium heat with a bit of olive oil in it. When pan is hot, cook salmon skin side down for 3 minutes. Turn, cook 2 minutes more on other side. Turn skin side down, place in broiler. Cook a few minutes until done (this will happen quickly, do not overcook.) Place salmon on serving plate, brush remaining 2 T hot sauce onto top of fish. Serve with salad.

Monday, December 8, 2008

The leavening: Bread, for newbies (such as myself)

Bread_done

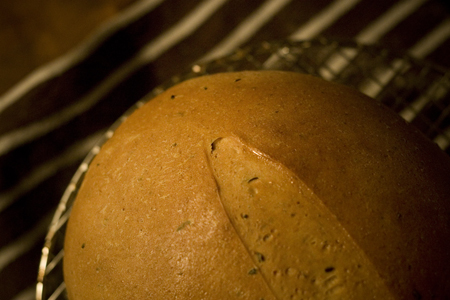
I am a carboholic. Bread, booze, you name it--odds are I love it. A nutritionist would say that it has something to do with the soporific effects of the carbohydrate, that it instills in the eater a sense of well-being and calm. I'm not so sure about that; though I will say that nothing makes me sleepier and happier than a few glasses of bourbon, that is hardly the point. Dopamine rush or not, the ACTUAL point is that I am a sucker for a good starch, and nothing better typifies my adoration than a perfect loaf of bread.

I've been interested in making bread for many a year, but like others, I was intimidated. I mean...you have to let things FERMENT. you have to KNEAD. You have to FEED the YEAST. For that kind of trauma, I might as well have a puppy, right?

(What was that about missing the point?)

Of course, such ridiculousness was fueled by the fact that I was living in Park Slope, the kind of neighborhood where you can go to the corner bodega and pick up a loaf of fresh rosemary sourdough at 2am; my perspective changed somewhat once I moved to Bed Stuy, where the grocery stores close at 7 and the bodegas sell beer by the bottle. If I wanted rosemary bread, I was going to have to make it my OWNSELF. And so, I rolled up my sleeves and set to work.

Bread_prebake

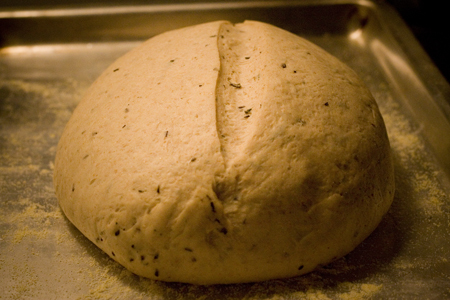
Inevitably, my journey has been marred by many a loaf of truly subpar attempts (though Bench, to his credit, will fall upon whatever disaster loaf I've concocted as though he's not eaten in a week and pronounce it heavenly, thereby inspiring me to keep trying), but I think I've finally gotten the hang of a basic loaf. The turning point? Stumbling across this recipe. This guy? This guy knows how to write about baking a loaf of (really straightforward, non-fancy) bread. The loaves I've churned out according to this recipe have been highly edible. Delicious, even!

Better than tasty loaves, however, is the weird feeling of confidence I find myself with at the moment. Though I'm hardly about to go out and start my own bakery, I suddenly find myself understanding what dough is meant to feel like at different stages, what the appropriate water temperature for proofing yeast feels like, and the pure, visceral delight of ripping open a fresh loaf and smearing a slice in butter. Best of all, I've realized that bread is not this strange, mysterious, fussy thing: Bread is earthy; it's forgiving; it's adventurous; it will take a lot of abuse before it decides to stop being your friend. Measurements don't need to be exact--bread is all about feelings. Just throw together the basic ingredients until it starts to work.

Plus, it smells freaking awesome as it bakes. Just saying.

Easy! Delicious! Basic! Bread!
as written by S. John Ross; please see his site for more detailed instructions and good common sense.

1-1/3 cups very warm water (100-110 degrees F or so)
1 rounded tbsp. sugar

2 teaspoons salt

2 tbsp. butter (vary as needed; see below)
3 rounded cups all purpose flour
1 rounded cup whole wheat flour

1 tsp. active dry yeast

  1. In a mixing bowl, dissolve the sugar and salt in the water; sprinkle the yeast over the top. Stir to dissolve, then let sit for 10 minutes.
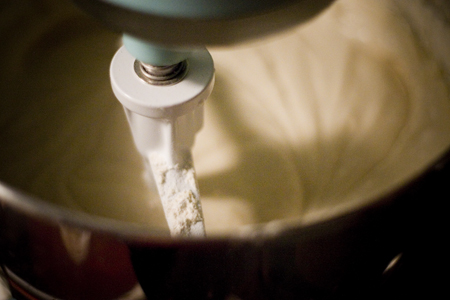
  2. Add the softened butter, then about 2/3 of the flour to the bowl (1/2 c at a time), and mix until the dough pulls away from the side of the bowl. Turn the dough out on to a floured board and flour your hands. Knead gently, mixing in the remaining flour slowly until the dough becomes a smooth mass (you can also do this in your mixer, with a dough hook. As I have no counter space, I prefer this method, but I know you might not).
  3. Put the dough into a mixing bowl that has been coated with oil or butter; turn once to coat and cover the bowl with cling film and a kitchen towl. Put it somewhere warm to rise for about 45 minutes (I like to preheat my oven to its lowest setting while I knead, shut it off and put the dough into the OFF oven to rise. As S. John says, the inside of the oven door should be hot to the touch, but not enough to burn).
  4. After 45 minutes, take the dough out of its warm place, and punch its daylights out! Then, give it a quick knead, adding more flour if necessary, and shape into a loaf. Place on a cookie sheet or pizza stone that's been given a light dusting of cornmeal; put it back in its warm place for a second rising, keeping it nice and toasty under a blanket of paper towels (or, the cling film and kitchen towel from the first rising). 45 more minutes, undisturbed!
  5. Remove the towel and clingfilm! Bake at 350 (don't bother preheating the oven if you're in a hurry) for 30-45 minutes, or until the loaf sounds hollow.
The recipe is very forgiving and likes additions (like a handful of chopped herbs)--I tossed in some rosemary and thyme at the end of the first knead. Most delicious indeed.

Saturday, December 6, 2008

Feeding a Crowd: Make-ahead Brunch


Mission: feed ten people (including vegetarians) a brunch feast including sweet and savory on a Sunday morning without panicking, running out of burners, wishing you'd moved to the suburbs where they have real kitchens, or missing out on the fun once your friends show up and start mixing mimosas!

With mushroom sauce already made and in the fridge, grits cooking overnight, and french toast soaked in custard and ready to bake, we sat around this morning calmly drinking coffee. No last minute pancake-flipping, no slaving over a waffle iron—it's always best to make food that multiplies easily for a crowd. We popped everything in the oven as people arrived. Kielbasa would have been cooked on the grill, if we hadn't run out of propane at that very moment (doesn't that always happen?) It was fine, really, since I'm sure those kielbasa went a long way toward seasoning my less-broken-in cast iron pan.

These sorts of events make me wonder: will we get as much joy-per-square-foot out of our home when it's, say, twice as big? When we no longer work and sleep and cook and hang out in one room?


Make-Ahead Brunch Menu for Ten

Overnight Slow Cooker Grits
Mushroom-Sauce Baked Eggs
Kielbasa
Baked Cafe au Lait French Toast (recipe here)
Fruit Salad
Bialys with Lox from Russ & Daughters)
Pom-Orange Mimosas
Coffee

I would definitely repeat these eggs, though I'm not sure about the french toast. The bitterness of the coffee was pretty good when balanced with maple syrup, but it didn't thrill any of us. My tip for overnight french toast is to soak the bread overnight in about 3/4 of the custard mixture, reserving the rest to pour over the top the next morning after the initial amount has been absorbed. These can bake in the same oven as the eggs.


Pom-Orange Mimosas
One bottle sparkling wine, cava, or prosecco
2 cups orange juice (freshly squeezed is great!)
1 or 2 cups pomegranate juice

Mix in pitcher and serve in flutes!


Slow Cooker Grits
2 cups stoneground grits
9 cups water
1 T butter
about 1 cup grated cheddar cheese

Combine grits, water, and butter in electric slow cooker. This cooked on low for 10 hours. Different brands of grits and slow cookers will vary, but after 10 hours these were not quite done and had not absorbed all the liquid. We turned it up to high for about 20 minutes, then took the lid off and stirred while the water evaporated a bit for another 30 minutes or so, adding the cheese as the texture got thicker.


Earthy Vegetarian Mushroom Sauce
1 T butter
splash olive oil
3 cloves garlic, chopped
2 medium yellow onions, chopped
1 T fresh herbs (I used sage, oregano, and rosemary), chopped
1 teaspoon or so concentrated tomato paste (I like the kind that comes in a tube)
2 pounds crimini mushrooms
3 large portobello mushroom caps
1 cup wine (I used white, but red would be great if you have it around)
sprinkle curry powder
sprinkle dried oregano
pinch sugar
1/2 teaspoon balsamic vinegar or a little less
salt and pepper to taste
Splash milk or cream
1/4 cup yogurt or creme fraiche

In a large dutch oven, saute onions and garlic in butter and olive oil over low heat a few minutes, stirring occasionally, until translucent. Meanwhile, slice the mushrooms. I did half of them into medium sized slices for a nice texture, while the other half were diced smaller for a finer sauce. Add the tomato paste to the pot and stir until the onions are coated, this will help them caramelize a bit. Add the mushrooms as you slice them and stir to incorporate. Add wine, fresh and dried herbs and spices, sugar and balsamic, stirring and cooking on low-medium heat until mushrooms look fully cooked. Add salt and pepper to taste. (At this point, I cooled the mixture overnight to reheat the next morning.) Reheat sauce if necessary, stir in milk and yogurt.


Mushroom Baked Eggs

Mushroom sauce (see above)
12 free-range eggs
Freshly ground pepper

Preheat oven to 400. Split sauce between two ovenproof glass dishes (a pie plate works fine). Make indentations for eggs. Crack eggs into indentations, grind pepper on top and bake for 10-15 minutes. Do not overcook—they may not look as done as they are! Serve on top of grits.

Still waiting for that holiday spirit: Sweets and treats on the brain

Okay. I think I've finally recovered enough from Thanksgiving to once again take quill in hand and start blogging again. It's good to be back!

As you've probably gathered from the calendar, the holidays are fast upon us. As you've probably gathered from this post's title, I am still trying to get into the spirit of things. At the moment, I'm trying to prime the pump (so to speak) by pondering what exactly it is I'm going to be making throughout the season. I have come to the rather stunning conclusion that most people are going to be getting gifts of food from me (sorry to ruin the surprise, people I love!); likely suspects include dulce de leche, lemon curd, and the surprisingly successful chocolate covered mintmallows. I am, however, looking for a few more items to round out the insanity; perhaps something that involves actual chewing.
Conveniently, all the food mags are conspiring at this VERY MOMENT to give me a push, inundating me with (food) pornographic photographs and suggestions for luscious creations that I could try. Unfortunately, none of the recipes are ringing my bell. And so, I turn to the internet. This looks mighty intriguing (now that I have big blue, anything involving meringue is sounding more and more attractive); these don't look bad, either.

Any suggestions? What do you make for the holidays?

Monday, December 1, 2008

Thanksgiving Secrets and Leftover Treasures

Clearly Shiv's been busy. I have to admit, I'm a little jealous of that feast—mint julep pie???

The thing is, I'm also jealous of the leftovers. We could have tupperwared some up from our Virginia celebration, but the long car/train ride wouldn't have been great in terms of food safety. I'm sure plenty of you are in the same position—what if you need leftovers and don't have any?

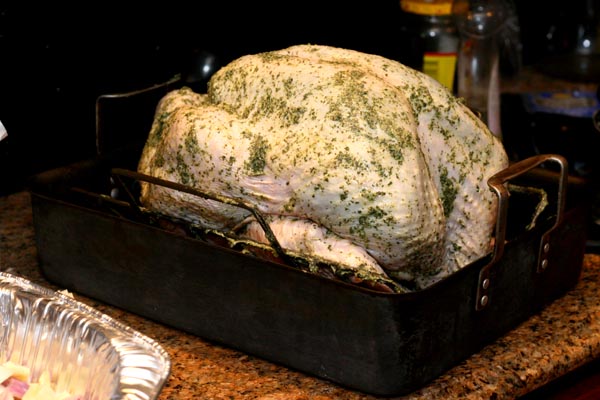
The answer is to roast up a couple of turkey legs (cheaply available post-holiday). I cooked four of them for about twenty minutes at 450 and 45 minutes at 400 after rubbing them with a little mustard, olive oil, and thyme. Why? My cravings for leftover turkey are threefold:

First, the meat will be perfect in an old-school casserole I'll make tomorrow: bechamel, broccoli, pasta, cheese, and turkey meld beautifully and some breadcrumbs will brown on top. My mom used to make a similar one with leftover chicken, but turkey's even better.


Second, the bones! If you still have a turkey carcass in your fridge, or you roast up some pieces like I did, please consider turkey stock. More flavorful than chicken broth, with a deep richness, turkey broth is the cold-battler of choice at our place. Matt grew up with it, and chicken broth just won't do when he has that pitiful nose-red-from-kleenexes look going. Tonight I'm trying the slow-cooker method (carrots, onions, roasted bones with a bit of the meat, and necks in the slow cooker with enough water to come within an inch of the top of the container. I'm cooking it for a few hours on high then switching to low for a total of 12 hours.) I particularly love turkey broth as a base for a greens-and-white-beans soup.
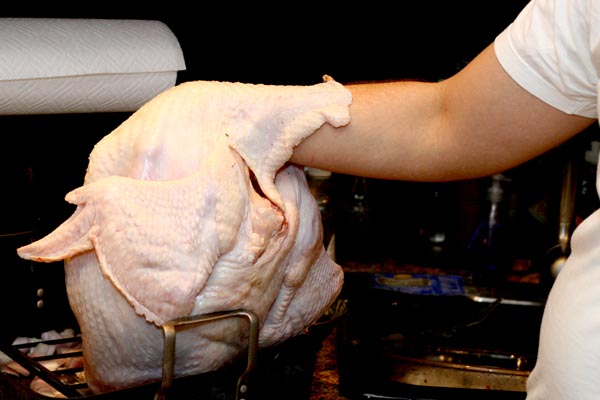
Finally, the secret, which I promised you back when we were talking about brisket.

My future mother-in-law's secret to easy Thanksgivings (and other turkey-based entertaining) is to always be one gravy ahead. The gravy from the previous turkey is frozen and rewarmed for the current meal. There is no last-minute gravy-making as you juggle side dishes and pies, carving and tablesetting, bread slicing and salad-making. You already have the gravy. Then, you make the next gravy later, while someone else is doing the dishes, or the next day, if you chucked the whole roasting pan and turkey carcass in the fridge to deal with later. Make your soup, make your gravy, freeze it, and then you'll never be harried on Thanksgiving again.
Of course, to get one gravy ahead, you either have to make volumes of gravy at some point and have leftovers, or create your own leftovers (as I did tonight) and make a gravy to save.

Consider it a gift to your future self.

Wrapping up

Hi everybody!

So, we've finally recovered from the holiday (more or less), so we're going to set about posting those photos and recipes that we're missing. So, bear with us as we backtrack and patch up the holes.
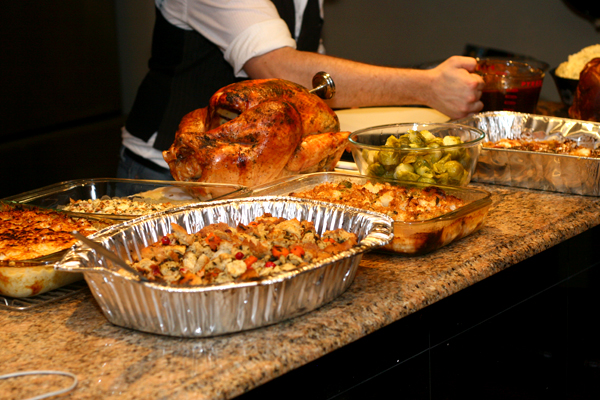
In the meantime, check out what the final feast looked like.

It tasted even better than it looked.

Happy December, everybody!

IMG_9786

Thursday, November 27, 2008

Control group: Meet your chefs!

Whew. The guests are starting to arrive. We are so far ahead of schedule (don't ask me how) that there isn't even any need to move quickly, much less panic. Everything is lined up on the bar, ready to pop into the oven. The turkey is gorgeous and aromatic (we turned on the oven; it helps), the potatoes are being peeled, and we're totally calm. I guess we've learned a thing or two about a thing or two about how to run this business over the last nine years.

So, you know. There might be a couple more updates, but I figured I'd take advantage of this lull to wish you a Happy Thanksgiving, and hope that you are as happy, and as hungry, as we are on this fine day. Thanks for joining us in our insanity here at Pithy and Cleaver.

With love,
Shiv and Biscuit

IMG_9760

Sourdough stuffing

1:50: This post should have started earlier, as the stuffing is essentially done now, but still. Better late than never, and all that. I love that we're at the point that I don't actually need a recipe for stuffing -- it's just vegetables, sourdough, and all the herbs in the world. For serious: parsley, sage, rosemary, and thyme (obvs), plus chives, and tarragon. Yarrrm.

Nothing you haven't seen before: Figs and prosciutto

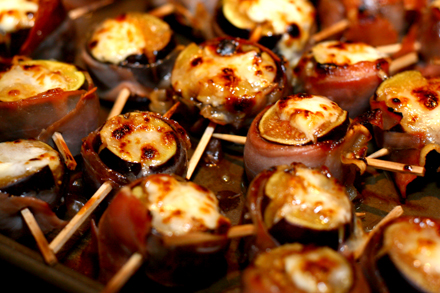
figs

2:44
: They are under the broiler, being professionally fabulous. T-minus 3 minutes!

IMG_9750

1:45:
They turned out so beautifully, I just had to give you a picture. Aren't they pretty?

Hi guys!

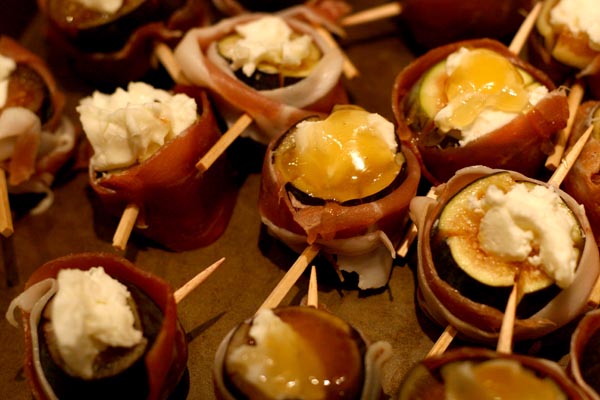
So, we're a bit crazed in here; we're assembling figs, my hands are full, Biscuit is juggling a thousand tasks. Delightful houseguest no. 1 is wrapping things in prosciutto, Delightful houseguest no. 3 is taking care of the dish backlog. My sister is lost and we're trying to give her directions. We're at capacity, which means we're probably not going to get to blogging the figs until later. Or at all, since ,you've seen these things before.

I will say: fresh mission figs. Coach farm triple cream cheese. 15-year old balsamic vinegar. Organic Sonoma County eucalyptus honey. Aw. Motherfuckin'. Yeah. This stuff's going to be good.

More later!

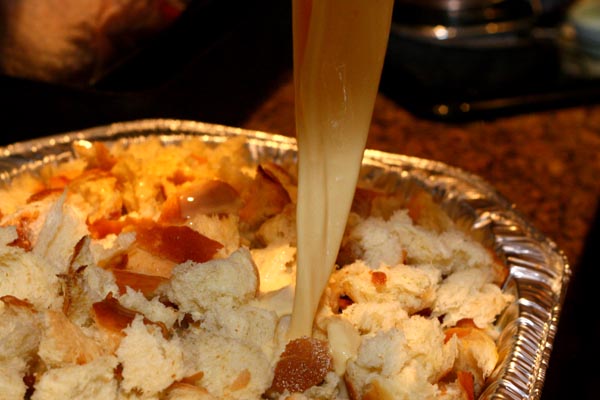
Do you think we have enough dessert? Tres leches bread pudding.

IMG_9736

12:20: Pudding is out, and smothered in dulce de leche. Having trouble not eating it all RIGHT NOW.

IMG_9705

10:50
: Eggs! Whipping! Milk! Being measured! Custard is GO!

Remember my obsession with dulce de leche? Notice that custard seems to be happening all over the place? Remember what I said about Biscuit's cat?

Yeah, because 5 pies just aren't enough, we're adding another dessert to the roster: Tres leches bread pudding, featuring a large jar of my homemade brew, a lot of brioche, and (of course) looooooooooooooooooove.

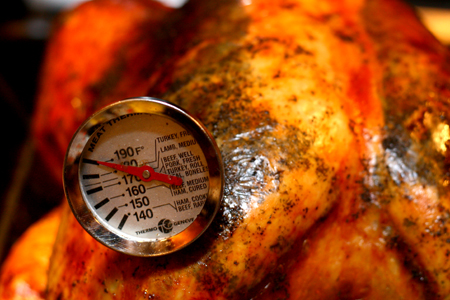
Main Event: Herb-Roasted Turkey

IMG_9775

4:41: More basting. The shallots are caramelizing. You don't even know.

1:50: Basting, basting. ...which would be easier with an actual baster. I tend to just slosh the stock across the top from a measuring cup, which works pretty well too.

12: 51:
Turkey's looking good. Would be looking better if the oven had been on.

12:22
: Ladies and gentlemen, the turkey is in the oven. Repeat: the turkey is in the oven. And it smells fucking AWESOME in here (not just the turkey).

IMG_9727

12:03 pm: Okay! We're all buttered up, tucked in, and ready to go. As soon as a couple pies come out of the oven, I can rejigger the shelving in there, and in she goes.


IMG_9725

11:47
: Shiv here. Biscuit is violating the turkey. And by "violating," I mean smothering it in the wonderful, delightful herb butter. Also wearing it as a glove.

10:30 am: After my first not-entirely-successful attempt at roasting a turkey (Maple-Glazed), I decided to switch to a different recipe for Year Two. I've never looked back. The Herb-Roasted Turkey always ends up succulent and delicious -- and as a bonus, makes a gravy that is so mind-boggling, I wish I could go swimming in it. As of right now, the turkey has been rinsed out, I have some slave labor (hi, Zack!) peeling me a mountain of shallots, and the herb butter is coming up to room temp. Turkey! Pow!

Hors d'oeuvres: Maki, anyone?

IMG_9761

IMG_9720

12:21: Unfortunately, the recipe for this is going to have to come later; it's go-time here, which means we're going to be doing more running around than blogging. Bear with us; all will be demonstrated in time!

11:58: finis! All that remains is to chill, cool, and plate. Though time consuming, this is far less difficult than you'd think. Don't be afraid to try it!

IMG_9717


11:44:
Still rolling the sushi. I am covered in peanut goo. Delicious, delicious peanut goo.

IMG_9713

10:48:
Wonderful, delightful houseguests have gone to procure soy sauce. Loves.

10:45:
Soy sauce. A regrettable oversight. Bollocks.

10:19:
Roll on, peanut filling!

10:06
: The rice has been rinsed and is soaking. It'll keep doing that for another 30 minutes or so, whereupon we'll boil it up until it's good and sticky.

We may not be traditionalists, but we have traditions here at the Thanksgiving of Shiv and Biscuit. These traditions include: two gratins (always!), the herb and shallot turkey, and...

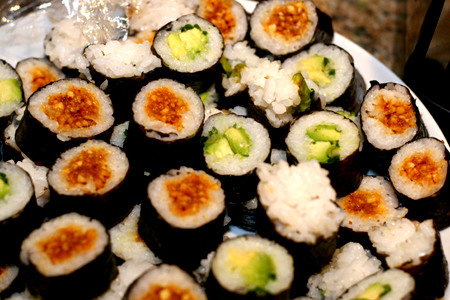
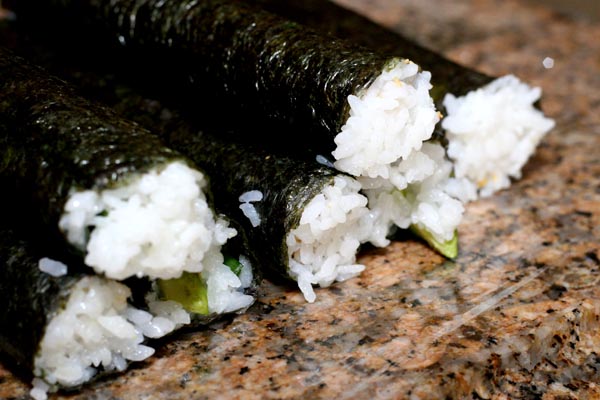
Sushi.

Vegetarian maki, actually. Spicy peanut rolls and avocado scallion rolls, to be exact. I couldn't tell you exactly how this tradition got started, because I was probably drunk at the time. As I tend to be at Thanksgiving.

I know, it sounds weird. But it is delicious, and has managed to keep a delightfully incongruous toehold upon our menu, to the delight and confusion of all.

I'll show you how as soon as I finish this slice of quiche.

Thai peanut maki

1 1/2 c dry-roasted peanuts, chopped fine
1/2c smooth peanut butter
1/4c boiling water
1 tsp sesame oil
2 tbsp good soy sauce
1 tbsp seasoned rice vinegar
1 tsp brown sugar (or honey)
ginger, grated
red chili flakes
star anise powder
  1. In a medium-sized bowl, pour the boiling water over the peanut butter, whisking until completely combined.
  2. Add the chopped peanuts, soy sauce, vinegar, sesame oil, and sugar/honey. Season to taste with the ginger, chili, and star anise. That's it!
To assemble:
1 package (10 sheets) nori seaweed (many grocery stores carry this now)
2c sushi rice
1/2c seasoned rice vinegar
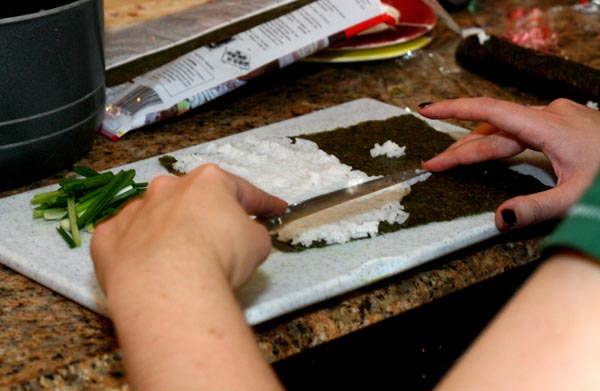
  1. Fill a drinking glass with water; put a butter knife in the water (sounds weird, but trust me)
  2. Take a piece of nori. Place enough prepared rice on it to cover 1/2 of the sheet (once it's smoothed out), in a layer about 1/4" thick. Use the wet knife from the drinking glass to smooth and spread the rice--it's glutinous and sticky, so using a damp utensil is KEY.
  3. Take a small handful of your filling and lay it out in a stripe along the center of the rice--it should be parallel to the long side of the rice field, about 1/2"-3/4" wide.
  4. To roll, carefully take the bottom edge of the nori (the side that has the rice) and roll it carefully around itself, moving away from you. The part of the nori that doesn't have rice on it should wrap around the resulting tube once or twice; seal it down using water. The seaweed will be on the outside.
I know, the assembly part sounds confusing, but it's really not all that difficult. There are tons of videos on youtube--and, frankly, your nori packet should come with instructions. I hope you try this--it's a really unique finger food that is guaranteed to impress the hell out of your guests.

Hidilly Hi, everyone!

Good morning, and happy Thanksgiving to you and yours!

The quiche is done, the coffee is spiked, the hangovers are mostly at bay. We're 4 and a half hours to showtime, and there's still plenty to do. But fear not! We will keep you apprised, with new posts aplenty. Also be sure to check back with some of yesterday's posts--we'll be picking up where we left off with a lot of our prep work.

Up next: more stuffing! more desserts! more cream! more cheese! more shiv! more biscuit! more awesome!

Wednesday, November 26, 2008

Good Morning Quiche

IMG_9700

9:08: And they're out and lovely. I'm going to the store for OJ!

THANKSGIVING, 7:50 am: Good morning, campers! Bubble away, my lovely little quiches. Bubble, I say!!

10:58: Crust's out, and we are Done For The Night. WORD.

10:04 pm: This has been the taste of the holidays in my family since I started making it when I was...ten? The first time I had this was when my mom's best friend put together a gift basket with everything pre-shredded, and all we had to do was whack it in the oven. Luckily, the basket included the recipe, and I haven't had a single holiday -- Christmas, Easter, Thanksgiving -- without it. It's actually really difficult to refrain from making this on "normal" days, but I like that I've managed to keep it a special-occasion breakfast. I have more happy memories than I can count, eating this while sitting around the tree or just curled up with a glass of orange juice (or, later, some good strong coffee!) Make the crust and grate the cheeses the night before, so when you wake up it's as easy as that first gift basket -- pop it in, and wait for it to bubble.

Holiday Quiche

24 oz frozen hash browns, thawed
1/3 c melted butter
1 1/2 c shredded swiss
1 1/2 c shredded pepper jack
1 1/2 c diced cooked ham (I use the first slices from a Honeybaked Ham)
1/2 c half and half
2 eggs
1/2 tsp seasoned salt

The night before: Squeeze the hashbrowns between paper towels to drain off extra moisture.  Press into a 10 inch pie plate to form a solid crust.  Brush the crust with the melted butter, being certain to brush the top edges.  Bake at 425 F for 25 minutes.  Let cool, cover with foil, and set aside.
The morning of: Mix the cheeses and ham, and pile in the crust.  Beat the half and half, eggs, and seasoned salt, and pour evenly over the cheese.  Bake uncovered at 350 F for an hour, or until the top has gotten brown and bubbly.

Mozzarella-stuffed Chicken Meatballs

IMG_9771

3:29
: The meatballs are out of the oven!

IMG_9691

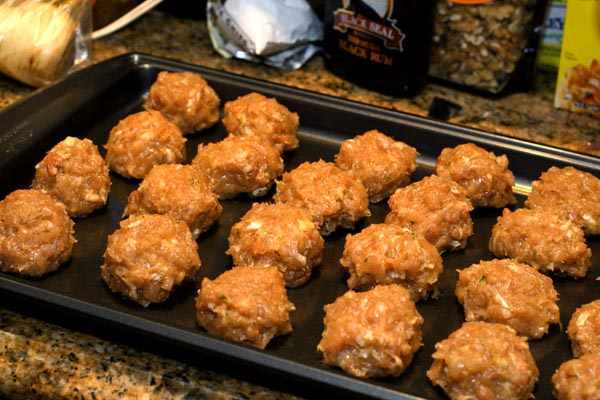
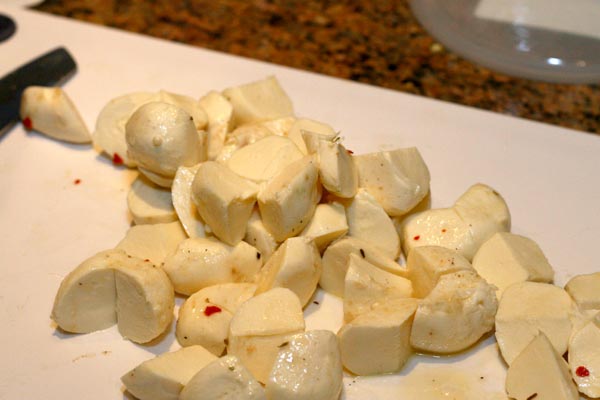
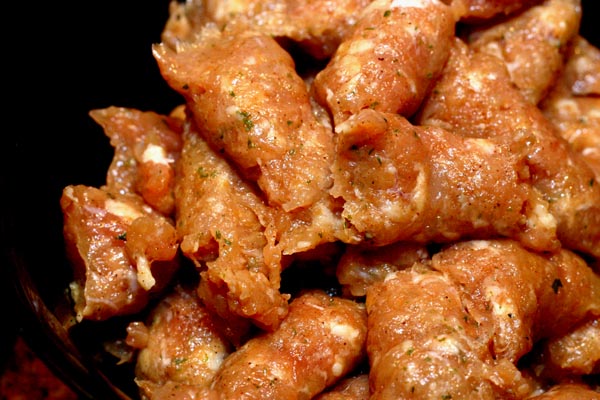
9:54 pm: I was so wrong. Decanting the chicken was not the grossest. Wrapping the boconccini in the mashed up chicken was. Wow. Still, gross as it was, as Shiv says, it was strangely satisfying. Meatballs are now assembled, cookie sheeted, refrigerated, and waiting for hors d'oeuvres time.

IMG_9688


9:36 pm:
Shiv here: Biscuit is making meatballs. Getting the sausage out of its casing was expectedly gross, and yet strangely satisfying. That is all.

IMG_9684

9:12 pm:
I think we're officially in the home stretch of this evening, which means it's totally time for the grossest moment of the day: decanting chicken sausages from their casings. Euurgh.

PiePiePiePie Part 3A: Mint Julep Pie--the recipe

IMG_9795

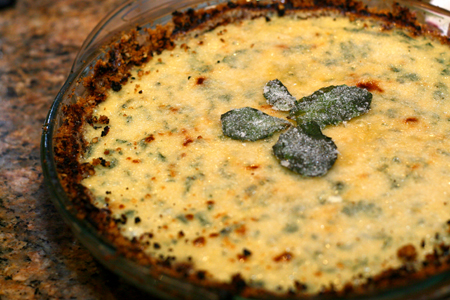
**Now with 100% more picture! You'll see we attempted a brulee crust on the top (I think we'll use a blowtorch next time), and garnished it with sugared mint leaves. Yum!**

And now, the moment you've all been waiting for! We're not going to torture you with liveblogging on this one--we'll just give up the recipe, pure and simple.

Prepare yourself!

Mint Julep Pie

Crust:
1o Graham crackers
1 1/4c pecans
1/4c sugar
6 tbsp unsalted butter, melted

Filling:
1 cup milk
1 cup cream
3 egg yolks
4 tablespoons sugar
1 tablespoon flour
¼ teaspoon salt
1 envelope gelatin
1/4c water
½ teaspoon almond extract
1/2 c (or a little more. You know. Whatever) your favorite bourbon
Good handful mint, chopped

Ganache:
4-5 oz dark chocolate
1/4 c heavy cream
  1. In your trusty food processor, whiz together all four crust ingredients. When it's a fine crumb, press it into your favorite pie pan. Whack it in the freezer for a half hour or so to set; then, pop it into a 350 degree preheated oven for 30 minutes or so (or, really, just until it's golden brown and aromatic). Set aside and let cool a bit.
  2. Make the ganache: Chop up the chocolate with a serrated knife, and put in a small bowl. Heat the cream, and pour over chocolate, stirring until smooth and shiny.
  3. Make the filling: scald the milk and cream in a double boiler. Meanwhile, beat together the egg yolks with the sugar, flour, and salt. Once that's a lovely pale yellow (and about tripled in size), gradually add the milk/cream mixture.
  4. Return the mixture to the double boiler and cook over medium heat stirring constantly until the mixture is thick enough to coat the back of a spoon.
  5. Meanwhile, bloom the gelatin by combining it in a small bowl with the 1/4c water.
  6. When the custard's done cooking, decant it into a cool bowl; add the gelatin and whisk until it's completely incorporated.
  7. When it's cooled a bit, add the bourbon, the almond extract, and the chopped mint.
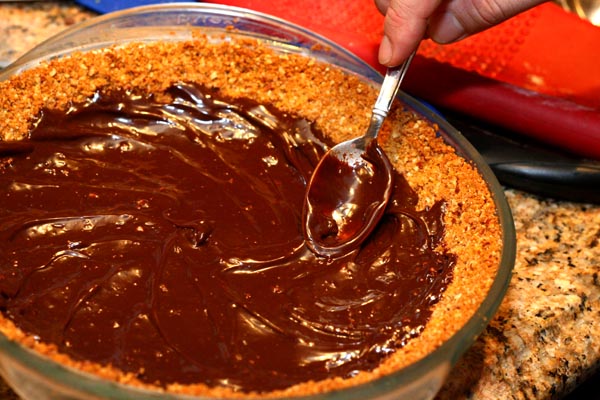
  8. Spread the ganache evenly over the inside of the graham crust, and chill to set.

    IMG_9677

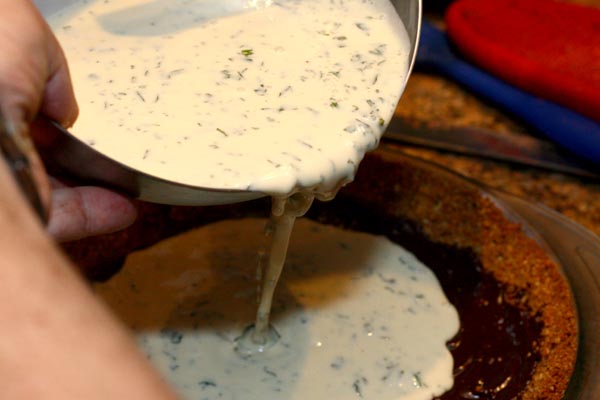
  9. Once the ganache has set, pour in the custard.

    IMG_9679

    Chill at least 4 hours, ideally overnight. Garnish with sugared mint leaves, or a brulee crust, or both, or something totally different. (You'll see which one we chose in the morning)
Ta da! Happy hunting, my lambs. Sorry we made you wait!

A dressing, a stuffing, a something delicious: Sourdough stuffing.

IMG_9669

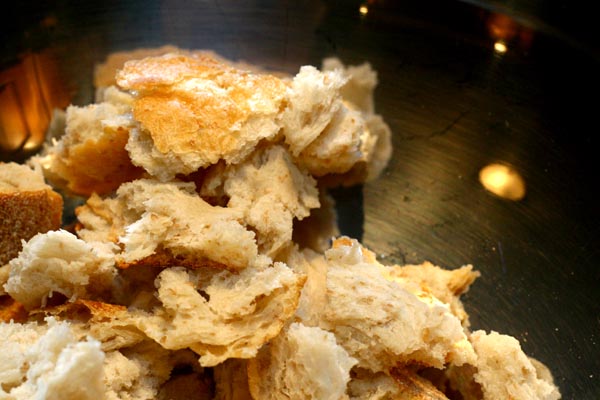
6:47: Still tearing. I think we're gonna need a bigger bowl.

6:18
: Last night, we baked up three parbaked sourdough boules from FreshDirect; showing admirable restraint, I managed to refrain from eating them then and there, so that they might be preserved for the current activity: tearing it into bite-sized chunks. Fun fact: bread is Biscuit's cat's favorite food. So, you know. We're going to have to be wily about where we leave it to get stale.

If you're anything like me, in your world the stuffing is the best part of the holiday meal. I grew up in a household where we cooked the stuffing inside the bird, so the whole business of cooking it in a pan (and, frankly, making it ourselves, instead of using Pepperidge Farms) is a little novel for me--and took some getting used to. However, now that I've been through a few of our Thanksgivings, I've seen the light! But, pan or bird, one thing remains the same: the stuffing is happening. The holidays have begun.

Cauliflower Gratin: Mmm.

7:20: Everything's done aside from covering everything with cheeeeeese and baking tomorrow. FABS.

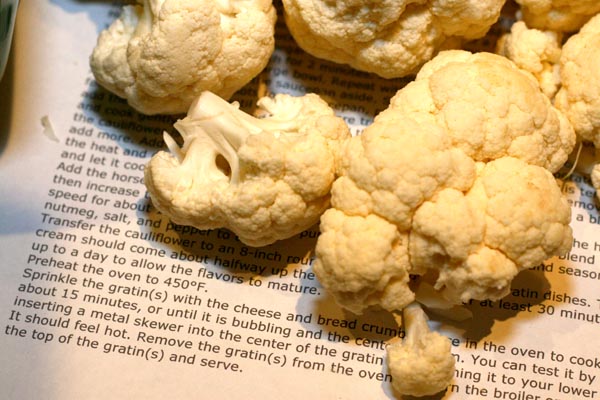
6:50: So. This has turned out to be pretty much as labor-intensive as I thought it was going to be. Still, it's pretty interesting labor, in that I don't usually a) completely deconstruct a cauliflower, or b) almost-puree the core and stemlets and cook them up like couscous.

IMG_9666

5:57:
Hey, Shiv here. Biscuit is eviscerating the cauliflower at the moment; we've been marveling at how tidy and compact the structure of the vegetable is--it's almost crystalline. Which makes it beautiful to look at, and a total pain in the ass to cut up.

4:43:
Every year we make sure to include a couple things we've never had before, and for the moment, that's the Gratin of Cauliflower. I'm looking forward to this -- I think that cauliflower is totally underrated and creamy, and this adds some heat from both curry and horseradish. It also happens to be a totally complicated recipe, with multiple steps of pureeing and blending and such, so we'll see how that goes.

Cauliflower Gratin

3 heads cauliflower
4 tsp white wine vinegar
3 tbsp unsalted butter
6 tbsp minced shallots
1 bay leaf
a few sprigs of thyme, parsley
2 c heavy cream
2 tsp prepared horseradish
1/2 tsp curry powder
freshly grated nutmeg
2 c grated Swiss-ish cheese, like Comte, Emmentaler, or the Appenzeller used here
2 tbsp panko or fine bread crumbs

Remove and discard the green leaves from the cauliflower.  Cut off the florets, and then cut and reserve the stems off of those.  Reserve the florets.  Cut away and discard the rough exterior of the core, then chop the interior of the core and the stems into small pieces and put in a food processor.  (Breakdown: You should have just the florets part in a large bowl, and then the stems and inside of the core in the processor.  Clear?)  Pulse the processor until the contents are very finely chopped, just short of a puree.
Bring a saucepan full of water to a boil.  Season with salt and 2 tsp of the vinegar.  Add half the florets and blanch for two minutes.  Drain and add to a large bowl.  Repeat with the other half of the florets.  Season the blanched florets with salt.
In the now-empty saucepan, add the butter and shallots.  Over medium heat, cook for a few minutes until the shallots are translucent.  Season with salt and pepper, and add the bay leaf, thyme, parsley, minced stems/core, and 2/3 c water.  Cook for 5-6 minutes until most of the moisture has evaporated.  Add the cream, and simmer a few more minutes.  Remove from the heat, and discard the bay, parsley, and thyme.
Pour this mix back into the food processor.  Add the horseradish, and blitz until mostly smooth.  Add the curry powder, salt, pepper, and nutmeg.  Blend well.  Toss the resulting puree with the florets, and transfer to a 9x13 glass dish.  Refrigerate for at least 30 minutes, or up to a day.
Preheat the oven to 450 F.  Sprinkle the gratin with the cheese and breadcrumbs.  Bake for about 15 minutes, or until it's bubbling and the center is warm.  Remove from the oven, turn on the broiler.  Brown the top of the gratin in the broiler for a minute, and serve.

Observation:

There's so much potential to unleash in just a cutting board and a sharp knife.

IMG_9657